We purchased this TR6 locally via eBay and it was pretty rough although the price was good. After the money changed hands, the tow truck arrived to cart it away to a friends barn. We replaced the dead battery and with a few squirts of starting fluid, it fired over and ran decently.


Next, the TR traveled to the house to begin the disassembly process. As everything came apart, abundant pictures were taken as well as all smaller parts were "tagged and bagged". We wanted to make sure we had some point of reference when putting the car back together. There are now two large 3-ring binders in the garage that contain all of our reference pictures...printed...8.5 x 11...in full living color... We have a Photobucket album containing pretty much every picture we've taken of the car to date including some of the sheet metal repairs completed. It can be found here:
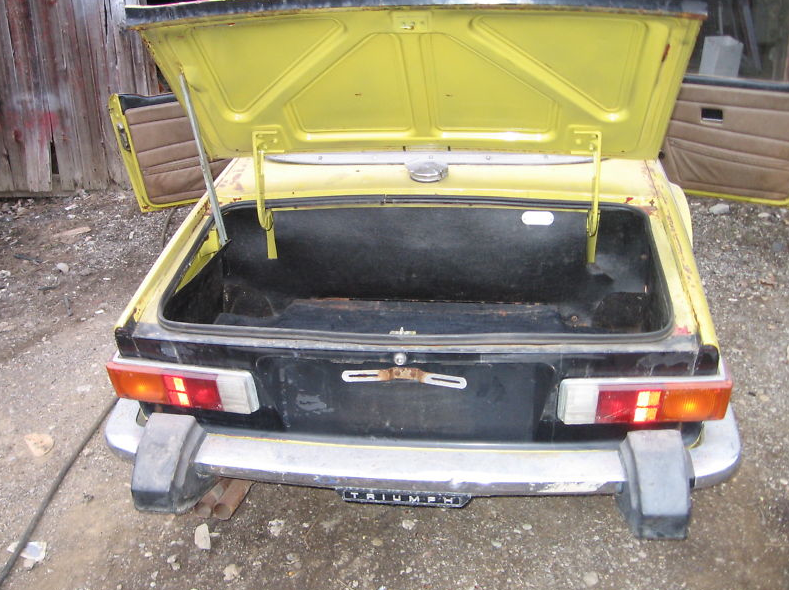
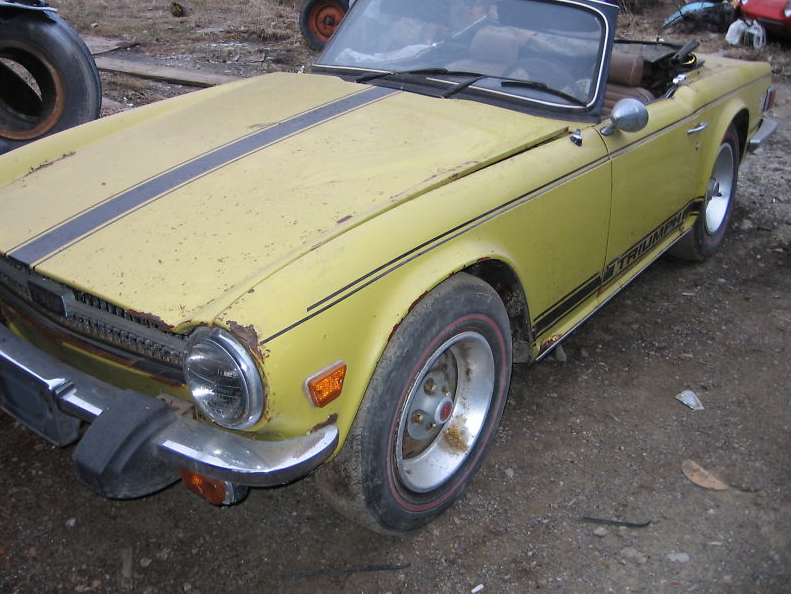
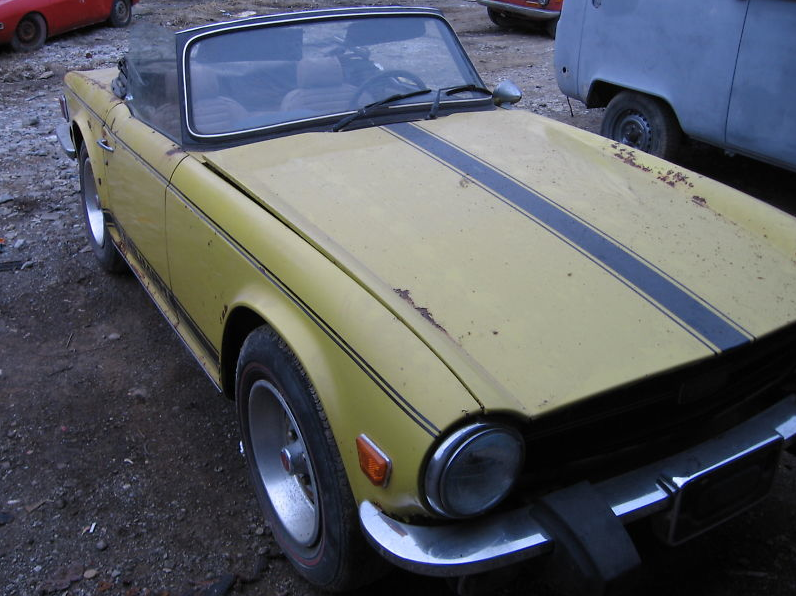
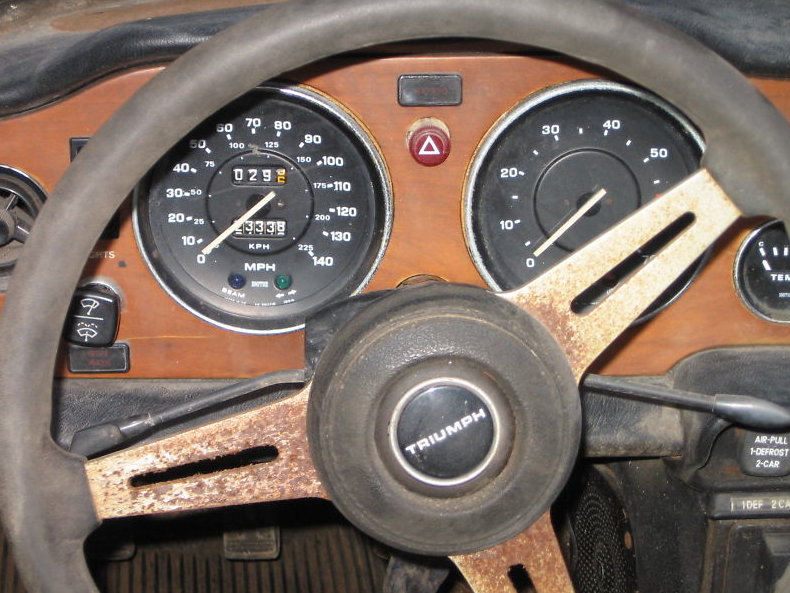
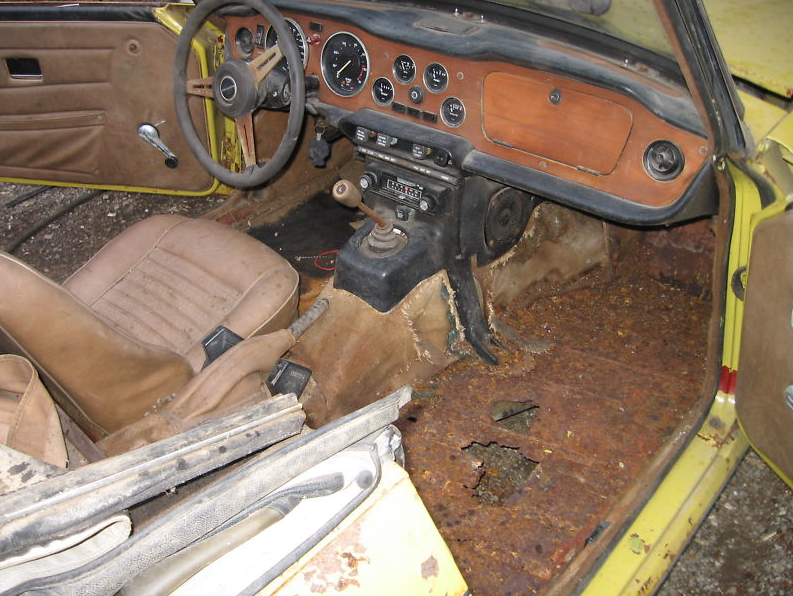
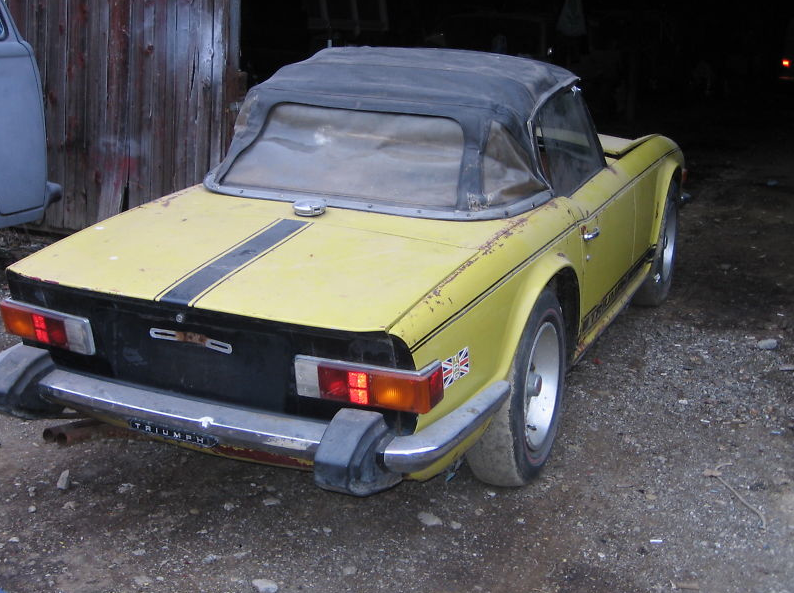
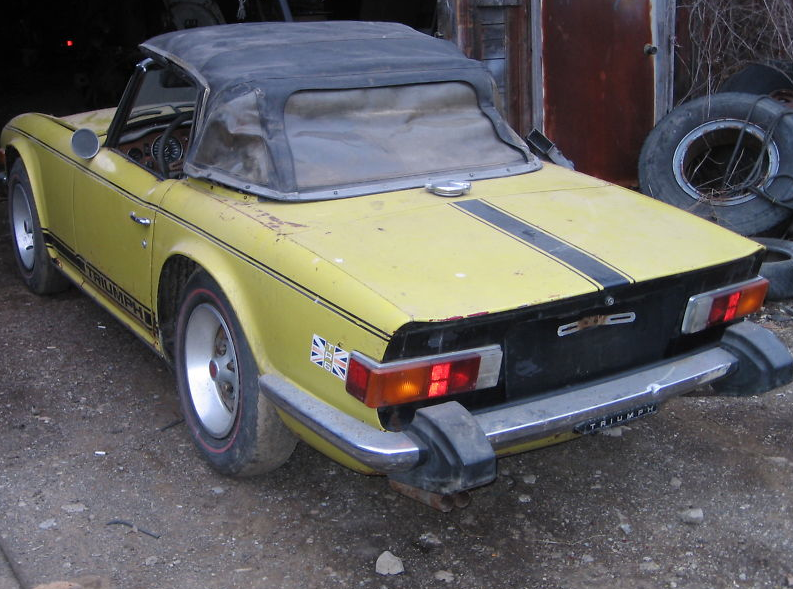
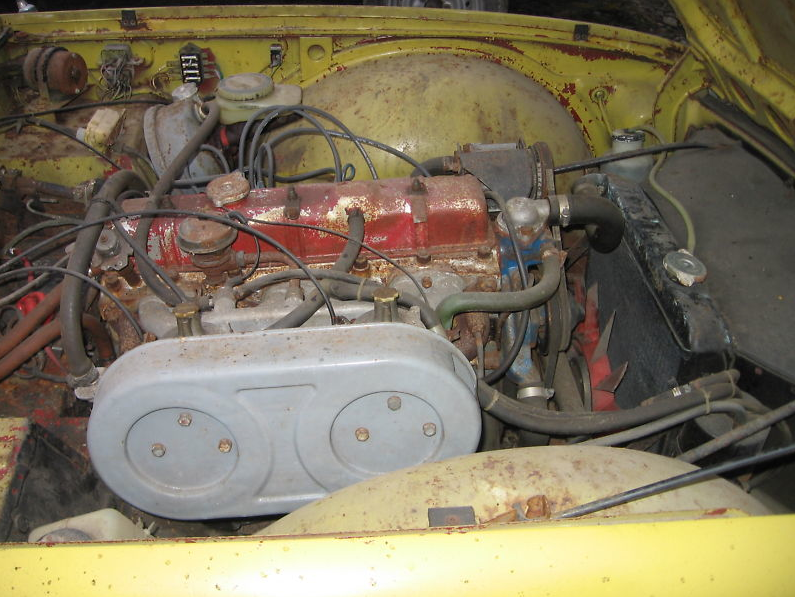
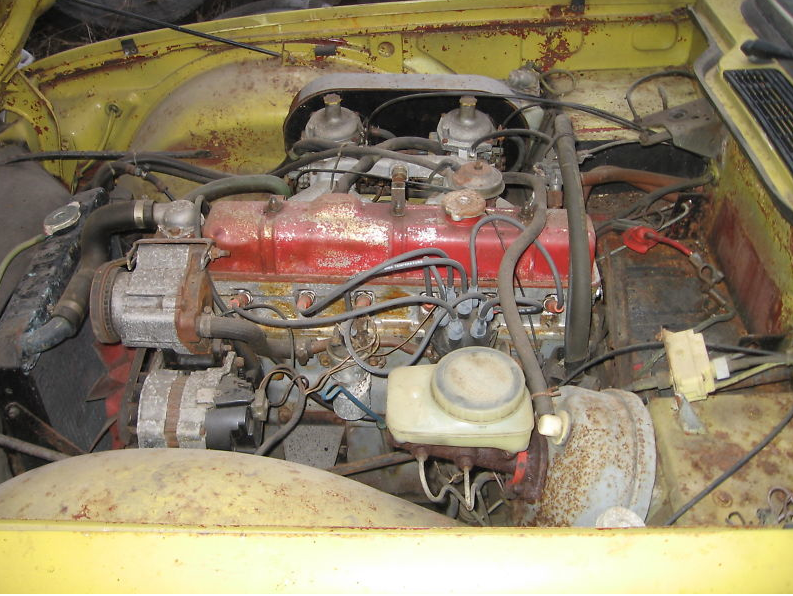
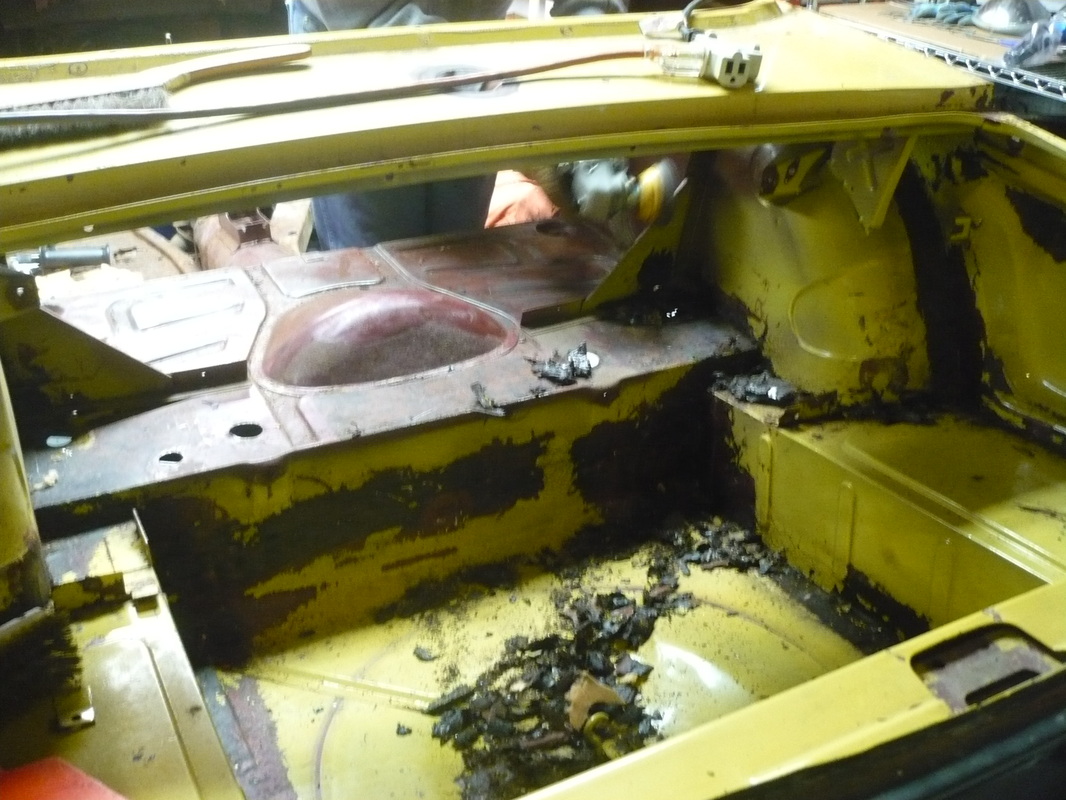
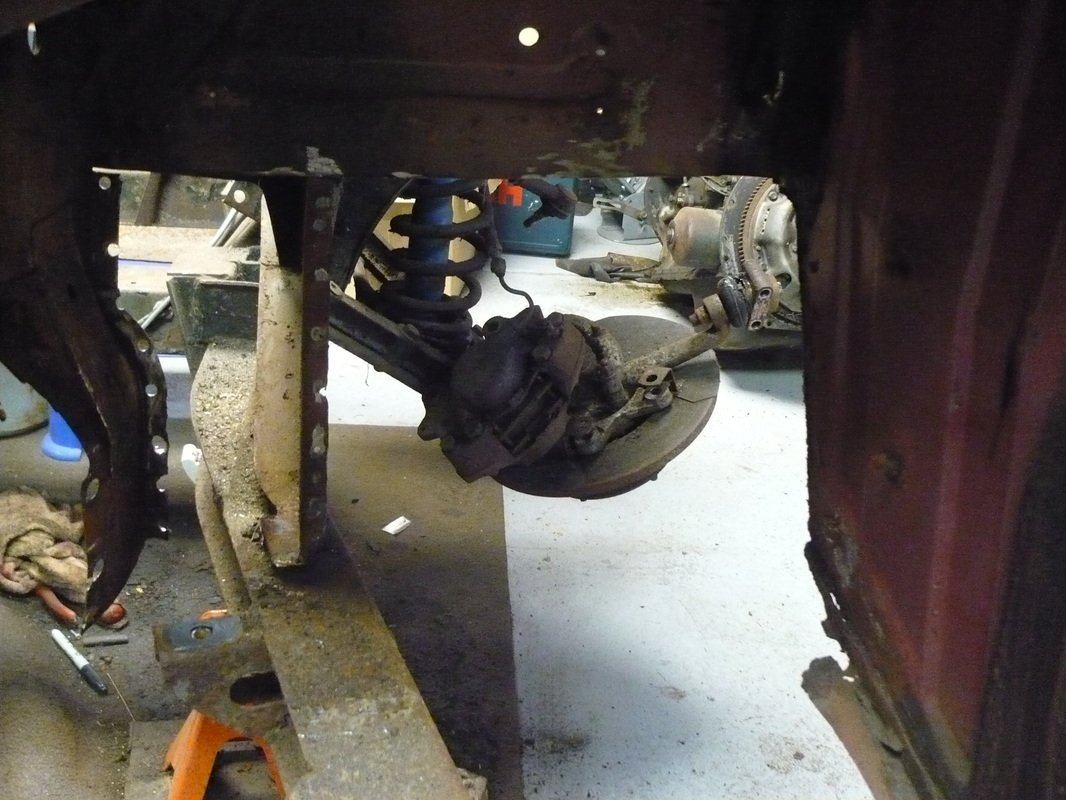
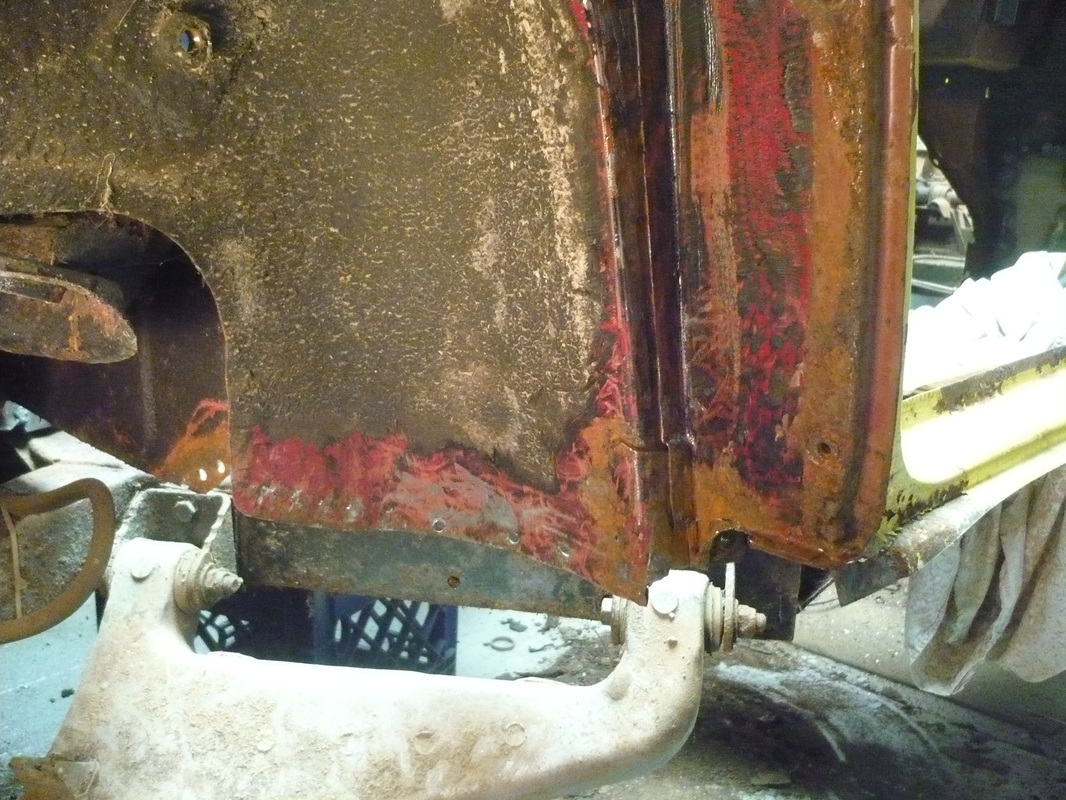
Here are a few pictures from the basic tear down that show the "best qualities" of the car...

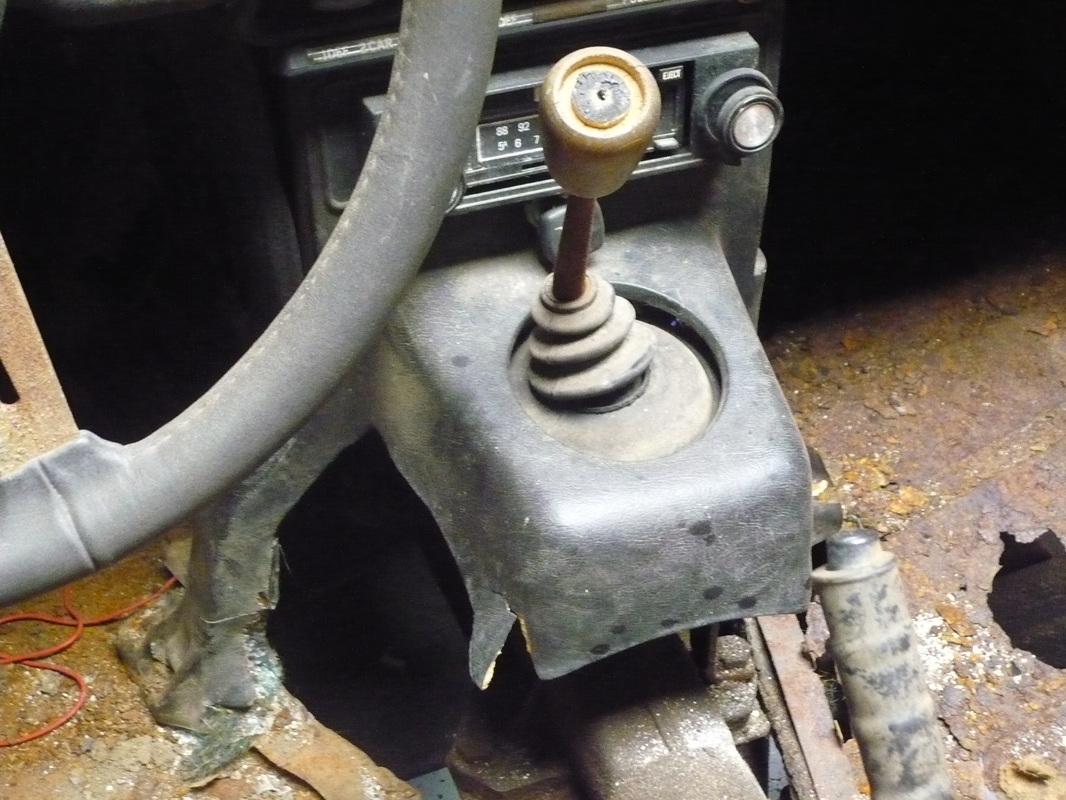

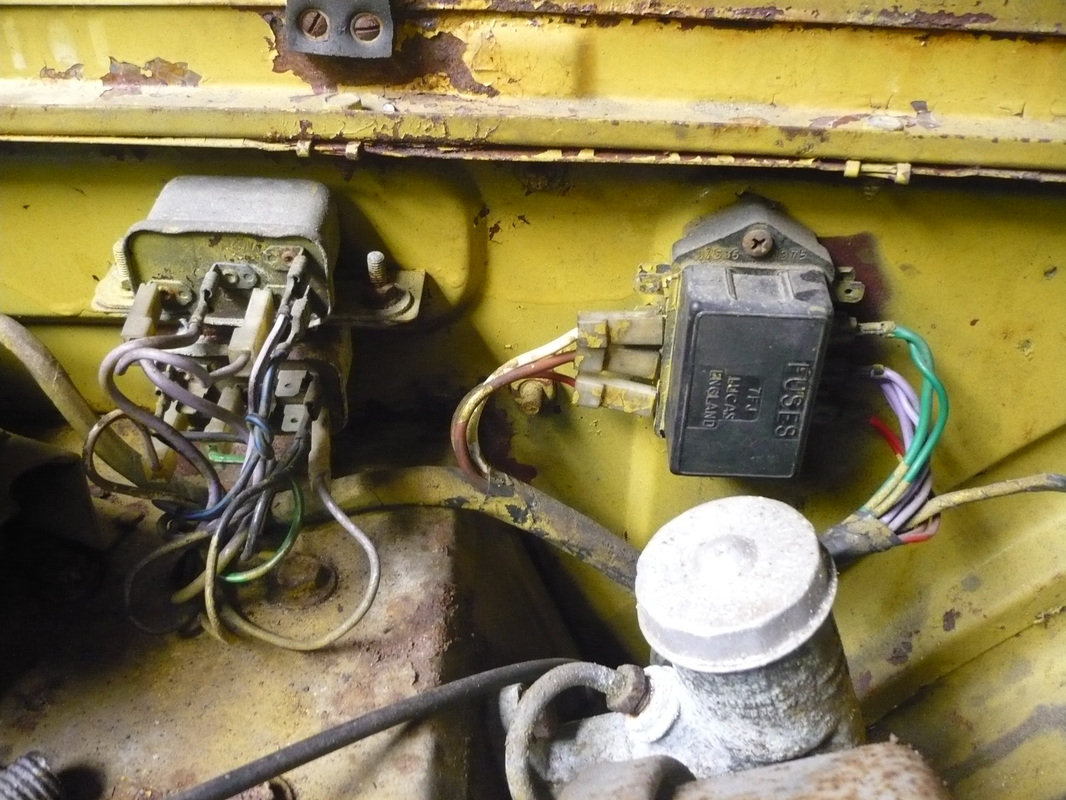
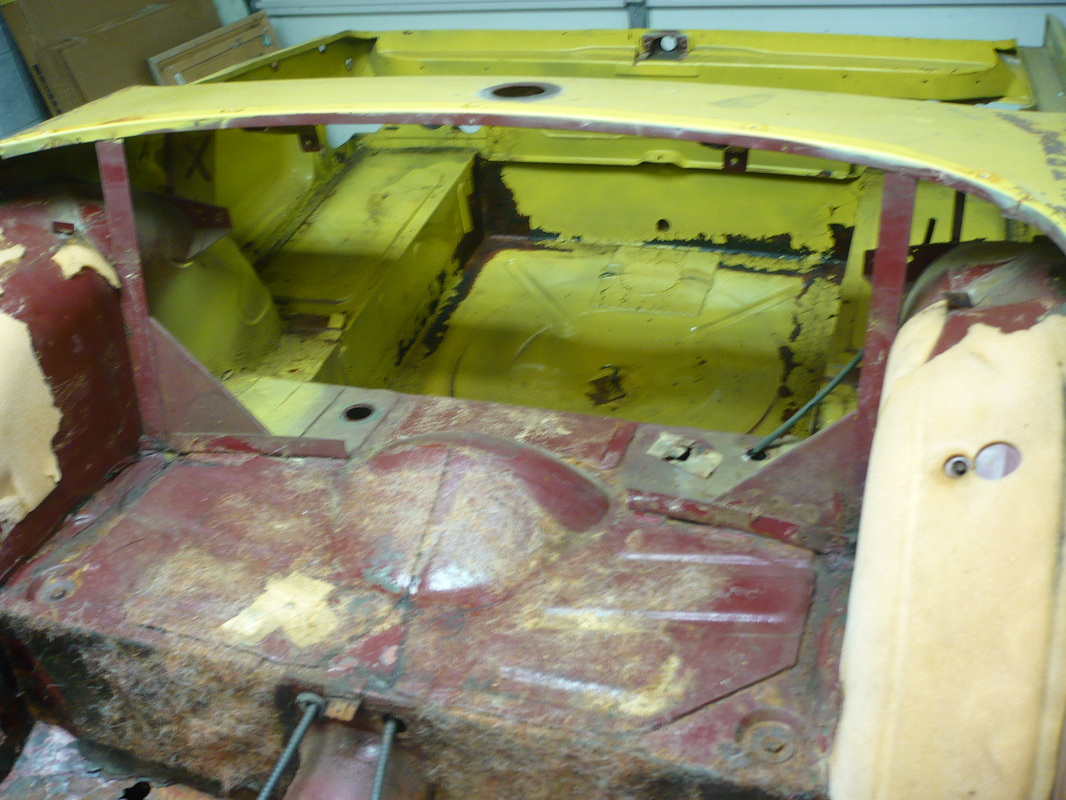
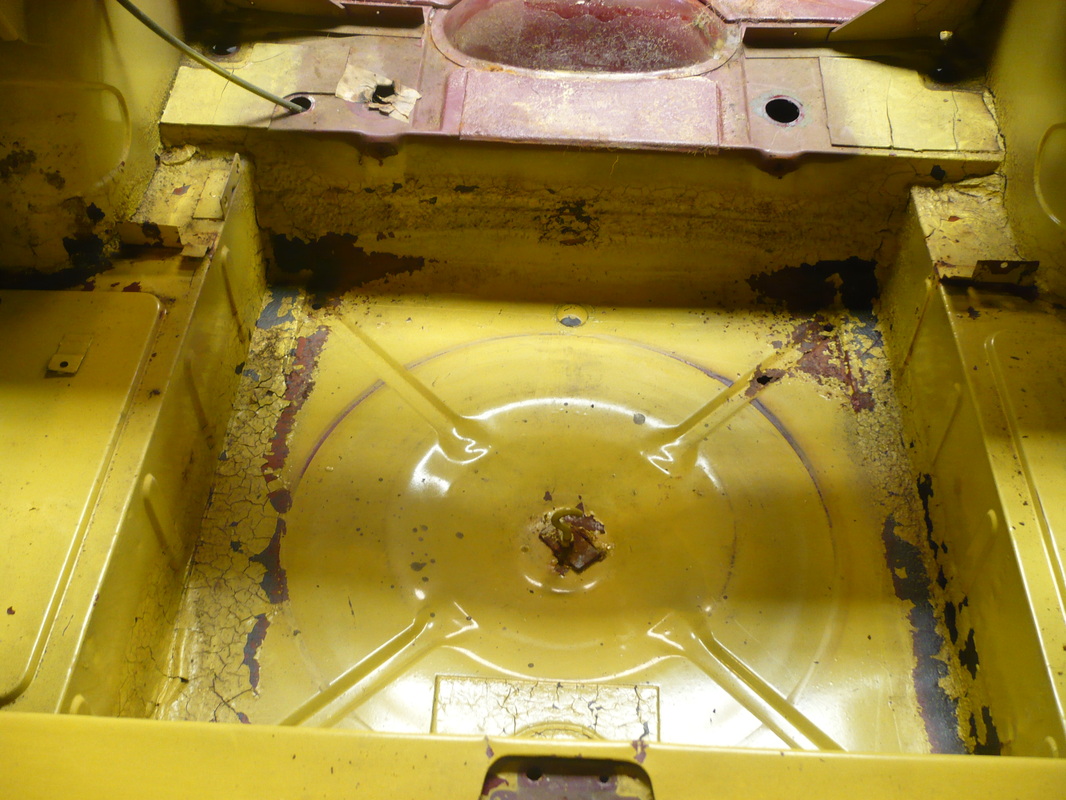
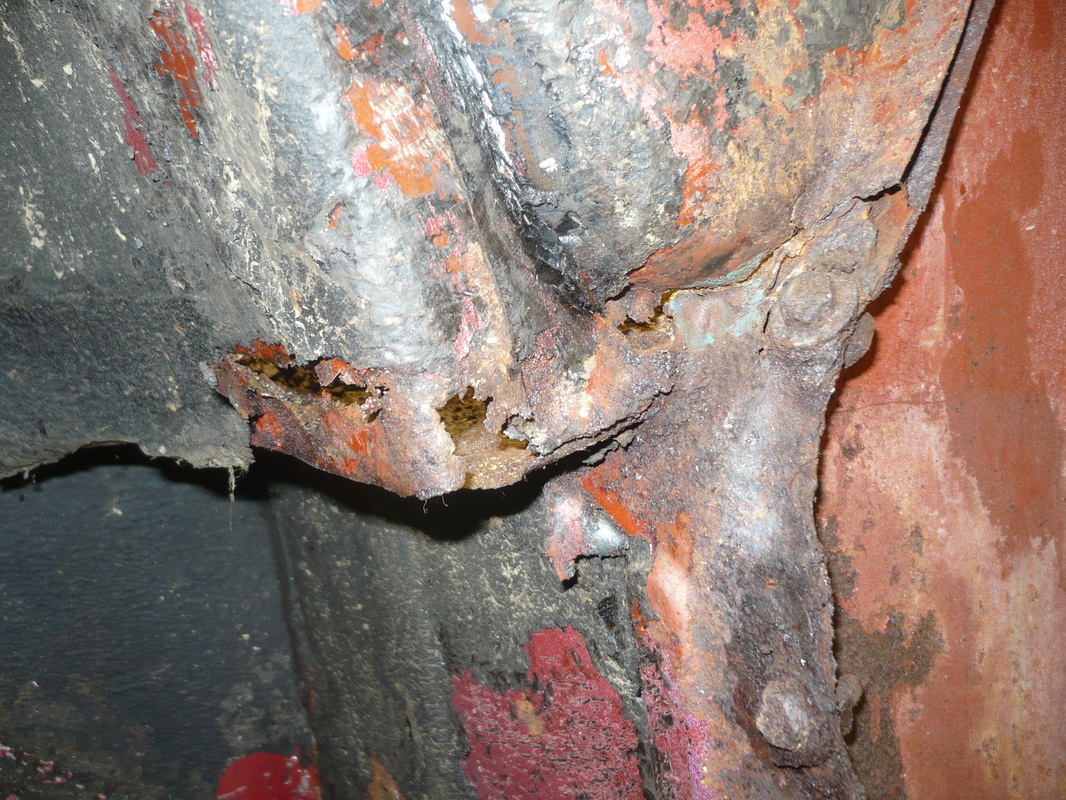


Okay...so maybe there are no real qualities to the car other than it being a TR6...
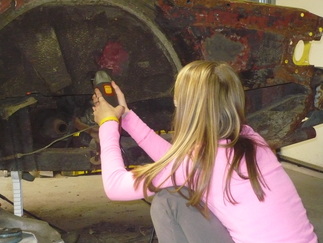
From the time the car hit the garage, the work was pretty much non-stop. Tina, Emma (one of our daughters), and I all enjoyed scraping the initial round of undercoating...still plenty more exists to this day....
From the time the car hit the garage, the work was pretty much non-stop. Tina, Emma (one of our daughters), and I all enjoyed scraping the initial round of undercoating...still plenty more exists to this day....
 |  |
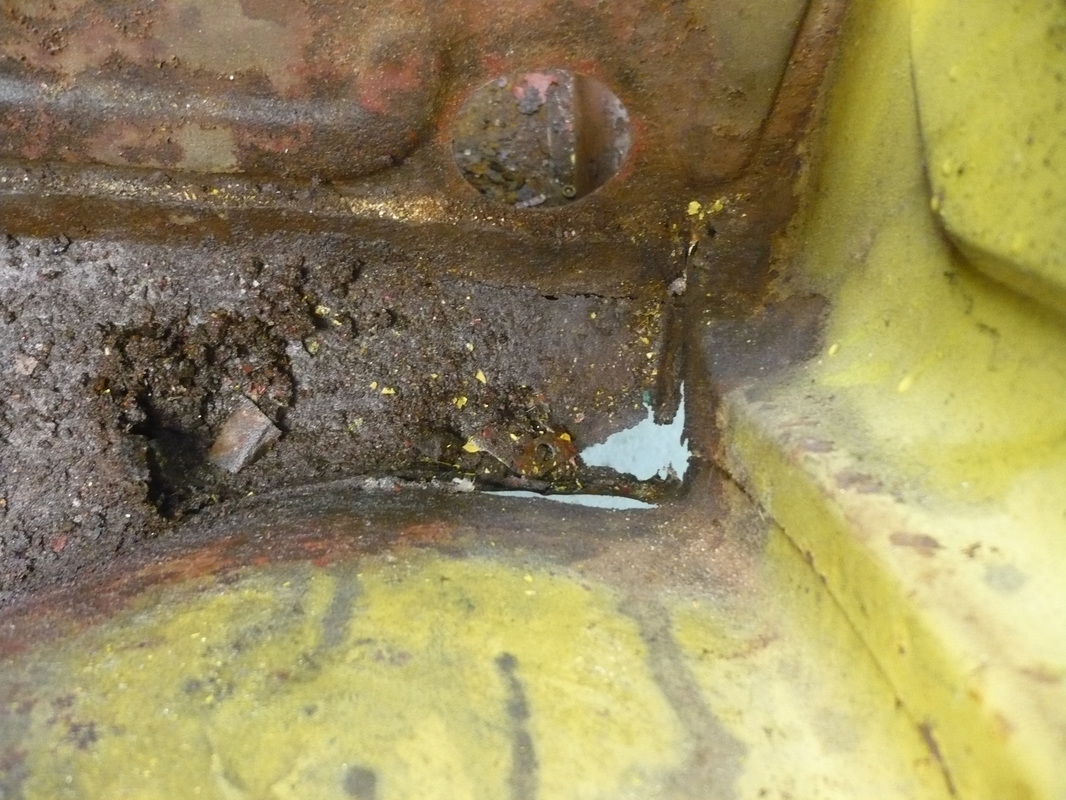
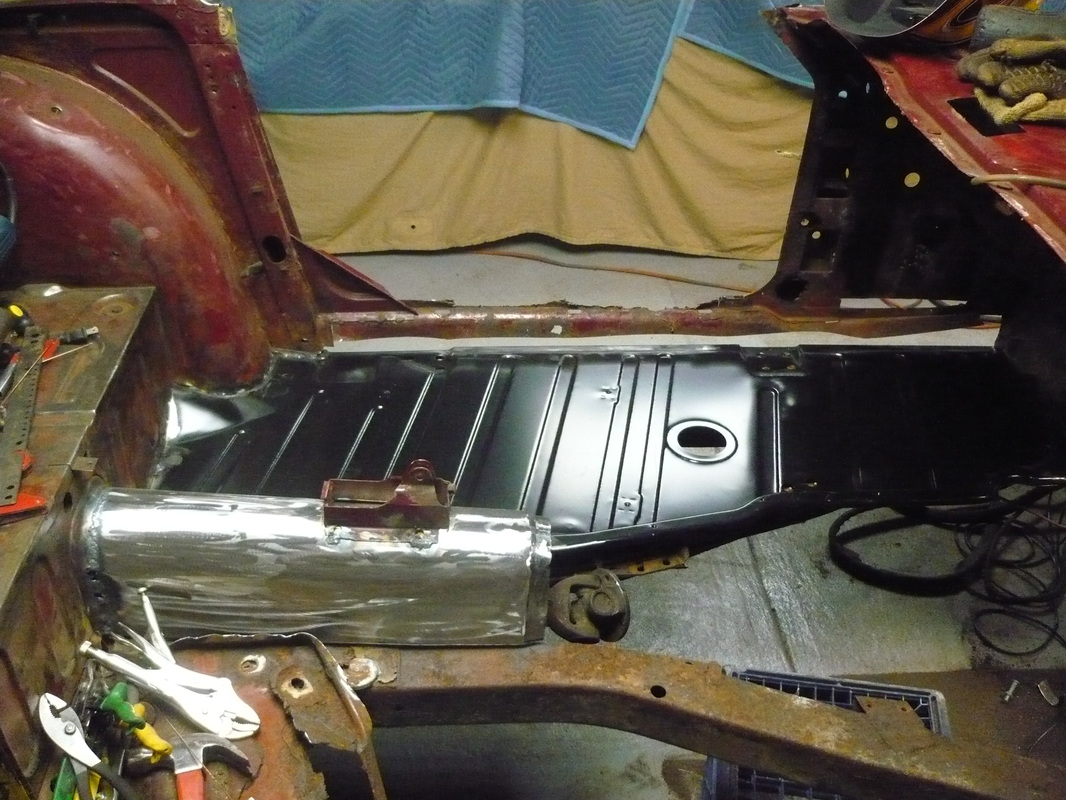
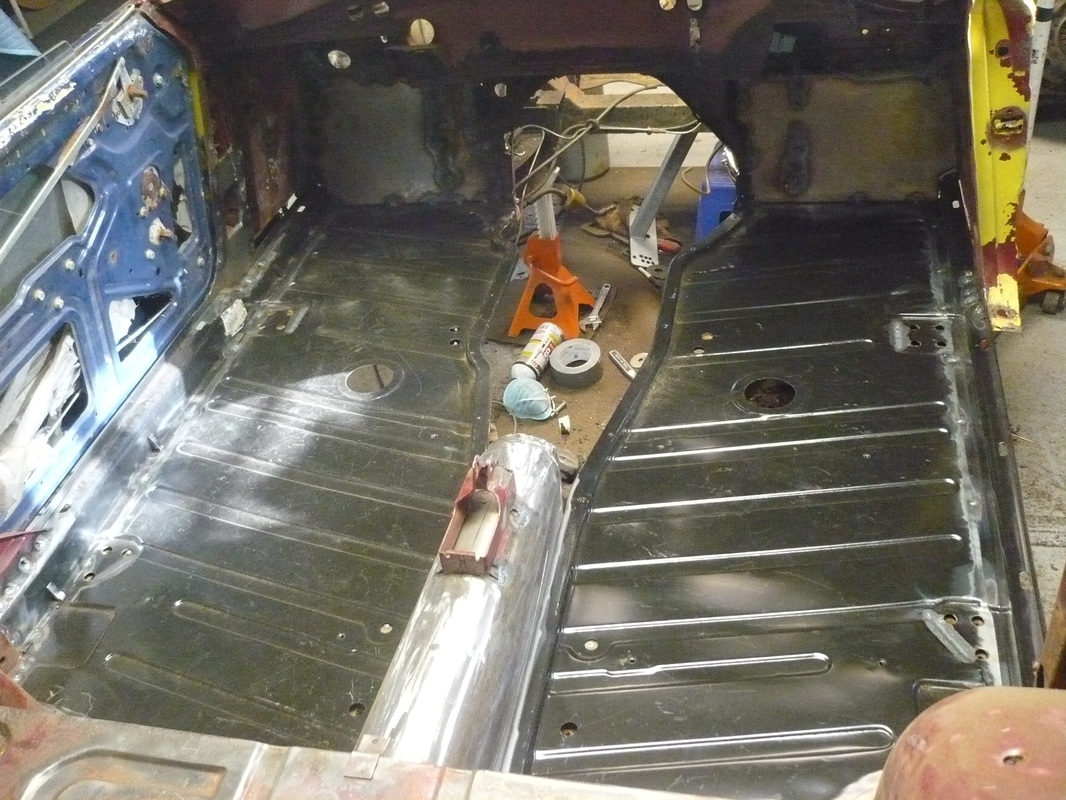
As shown prior, the floors were in very rough shape. We ordered new floor panels along with inner upper and outer sills. While waiting for them to arrive, the old floors were cut out and a little interior clean-up took place along with more undercoating scraping.
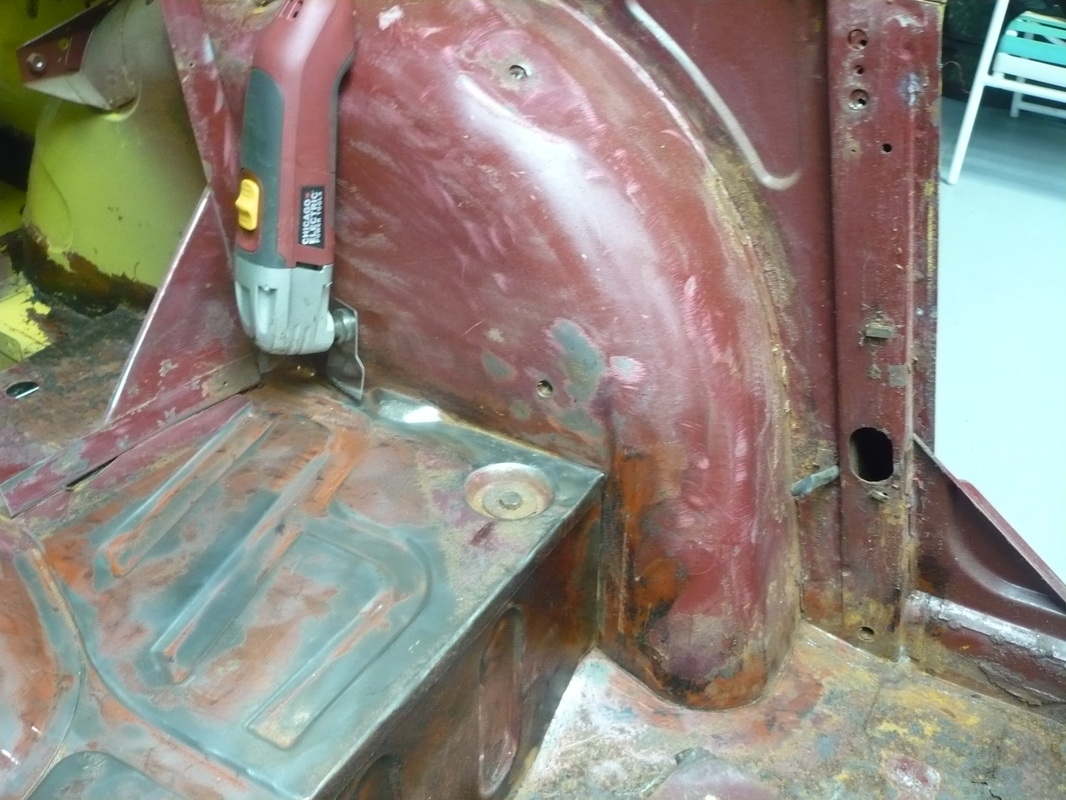
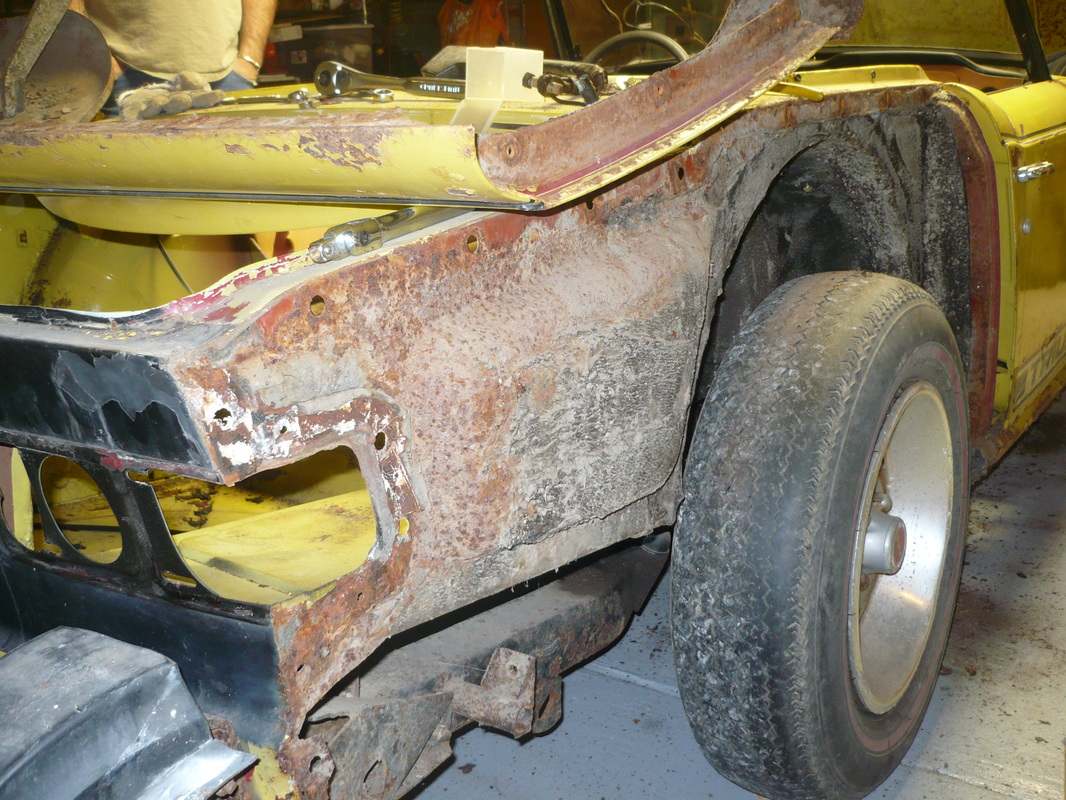
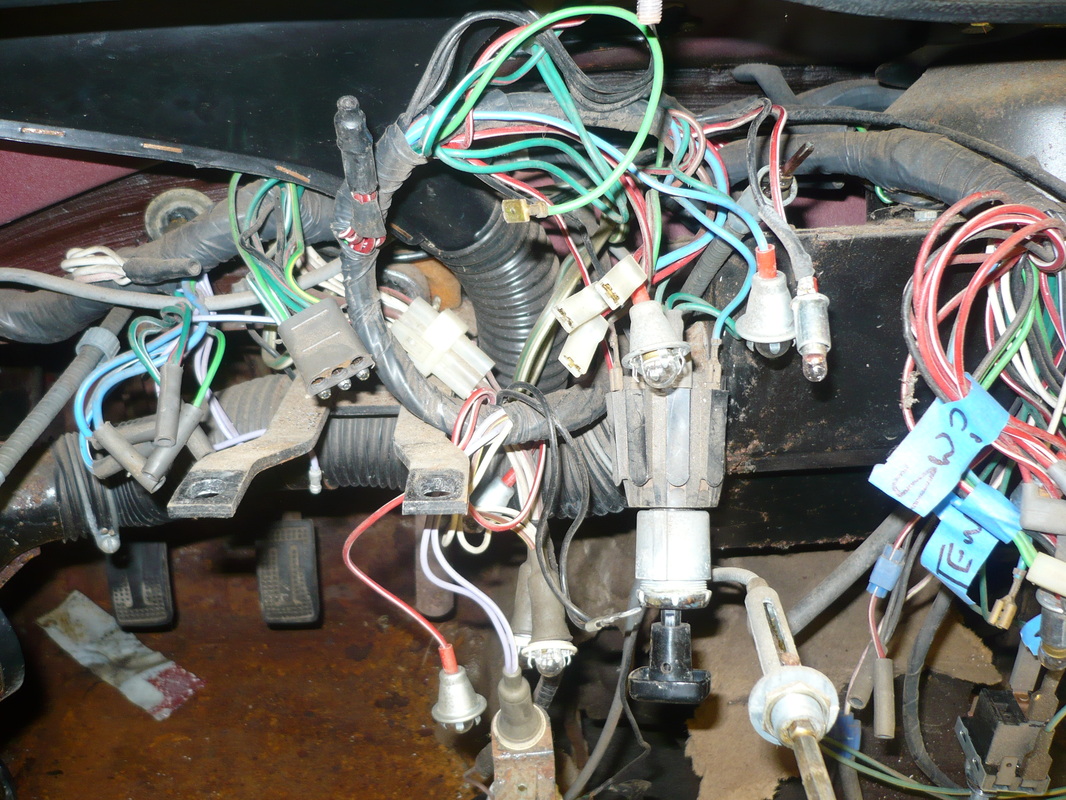
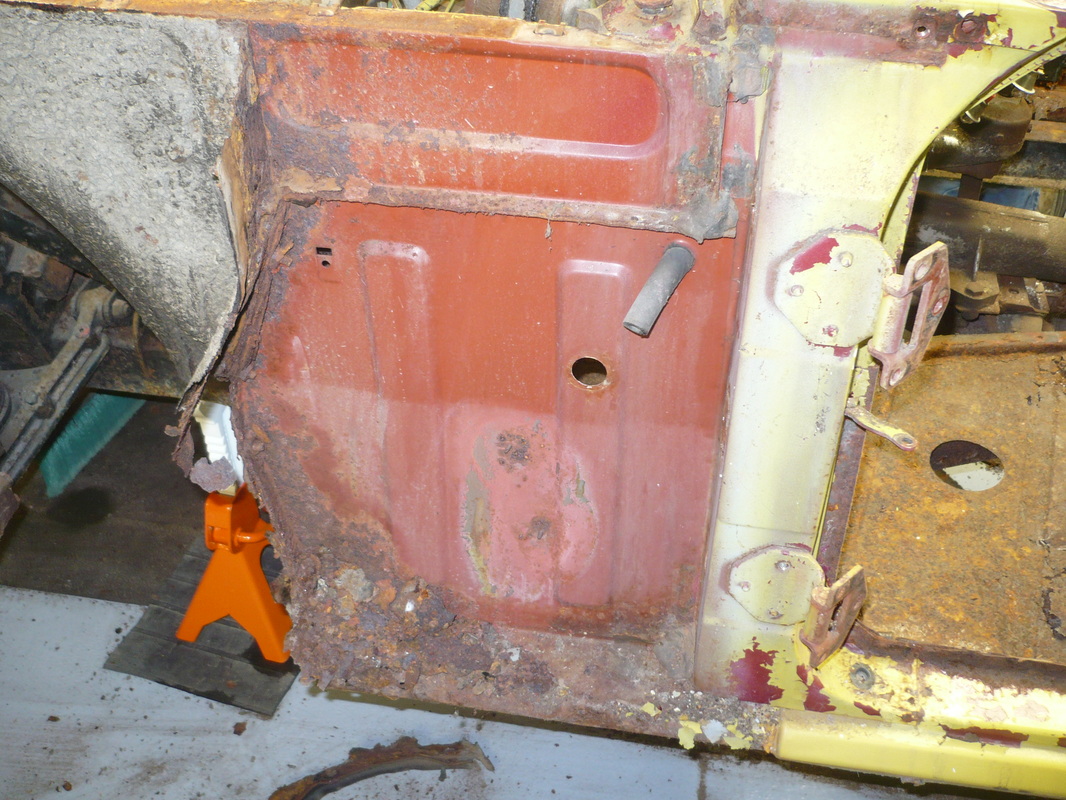
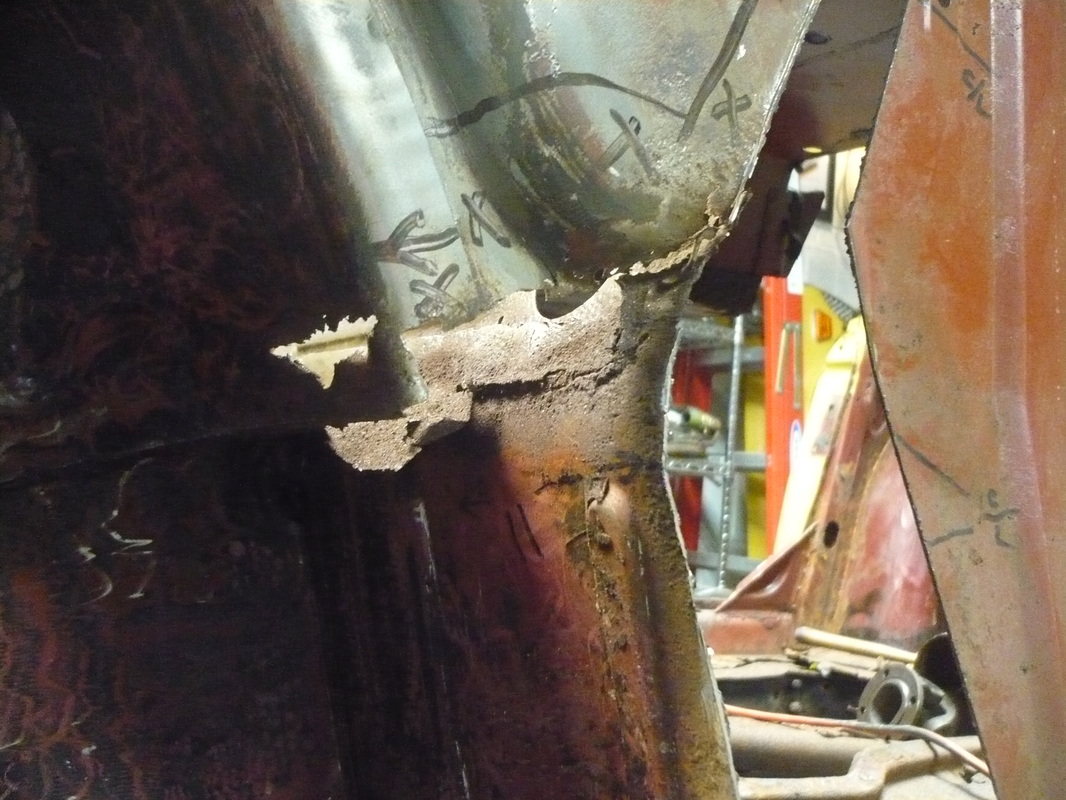
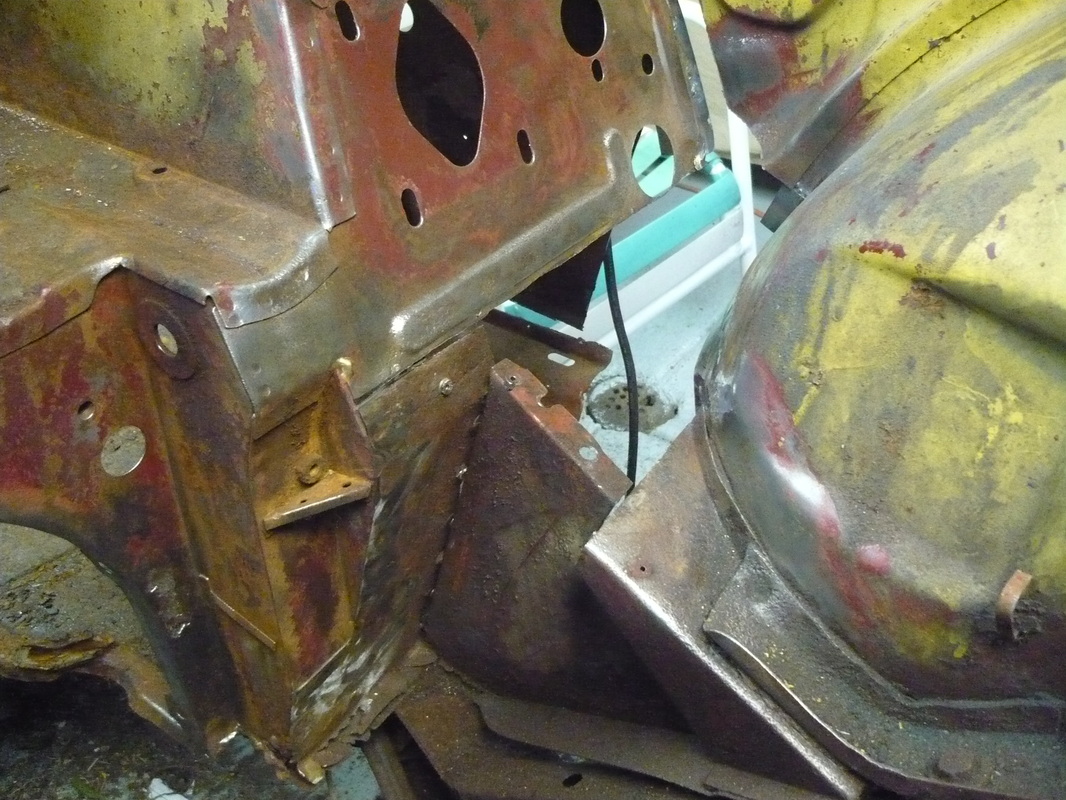
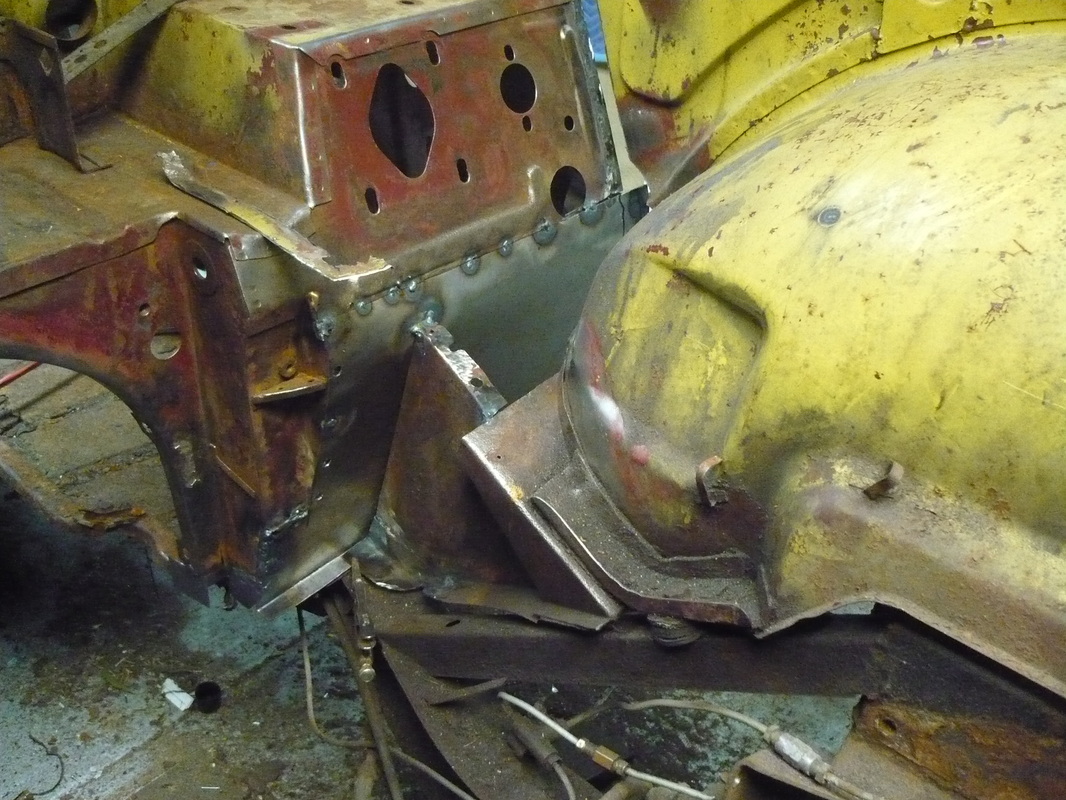
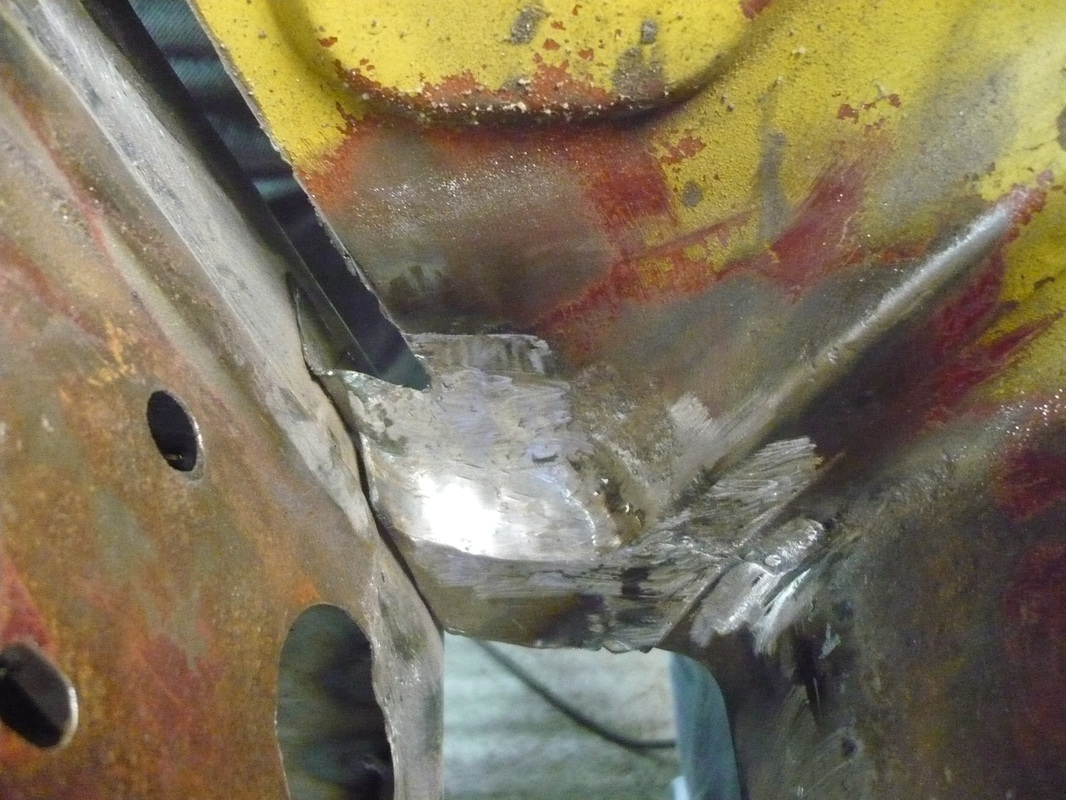
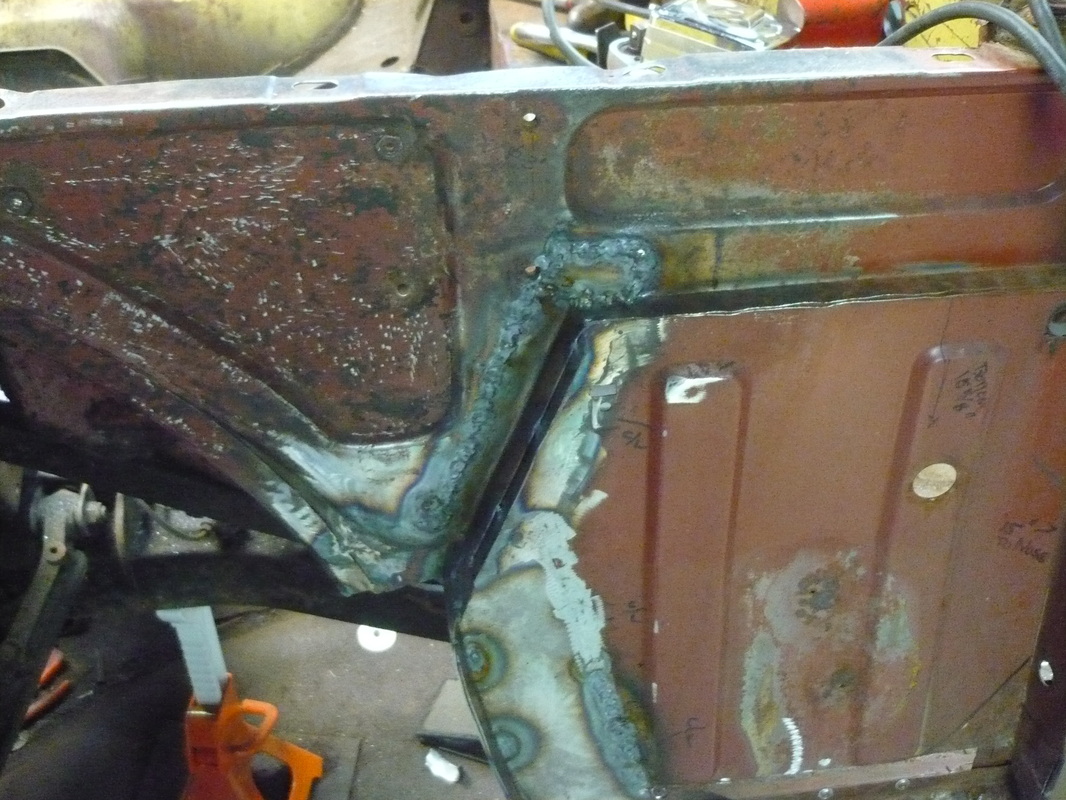
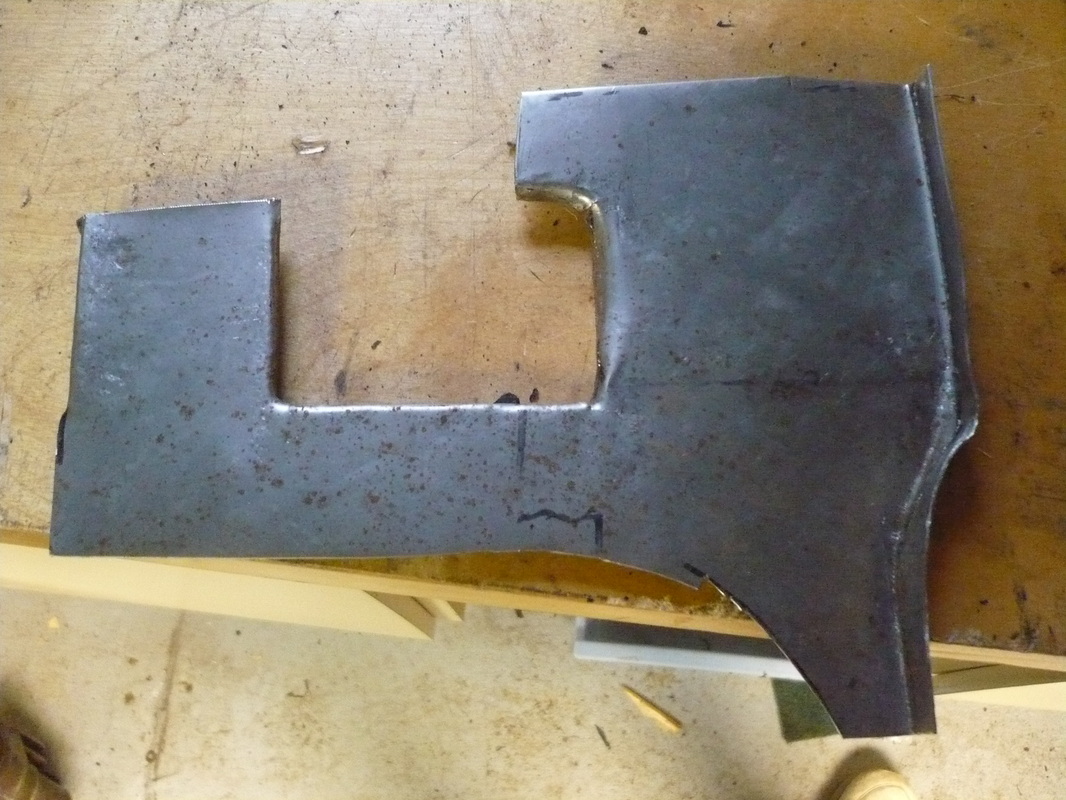
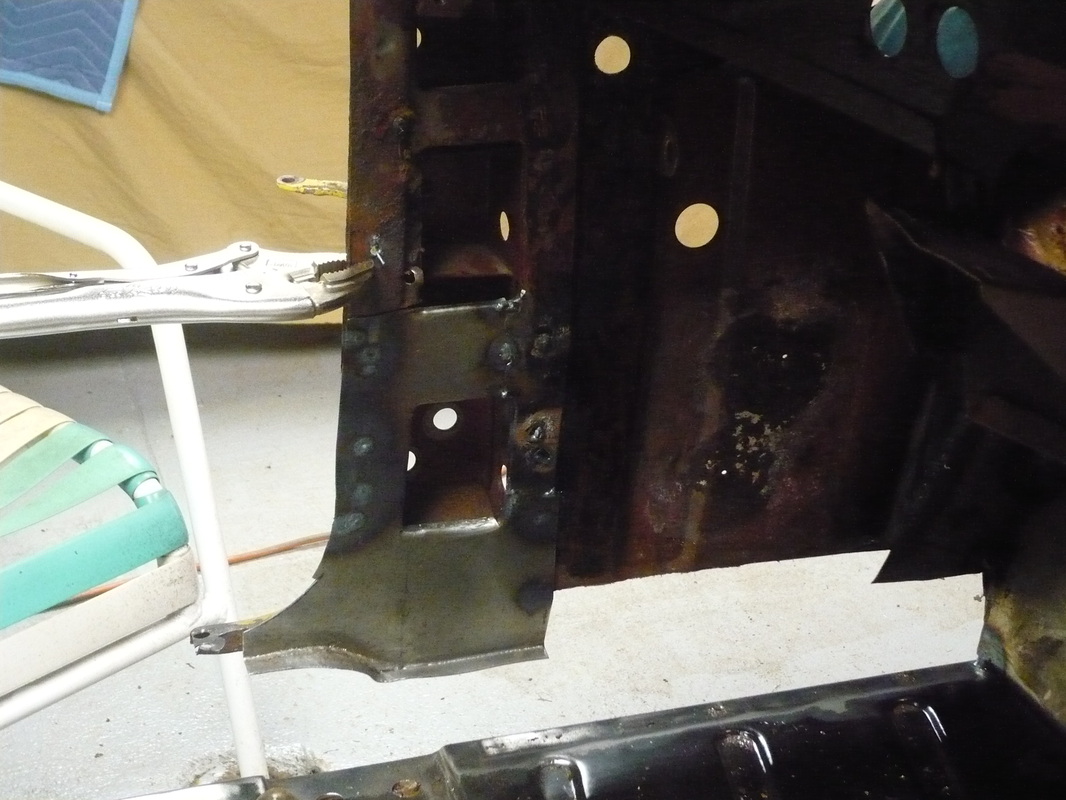
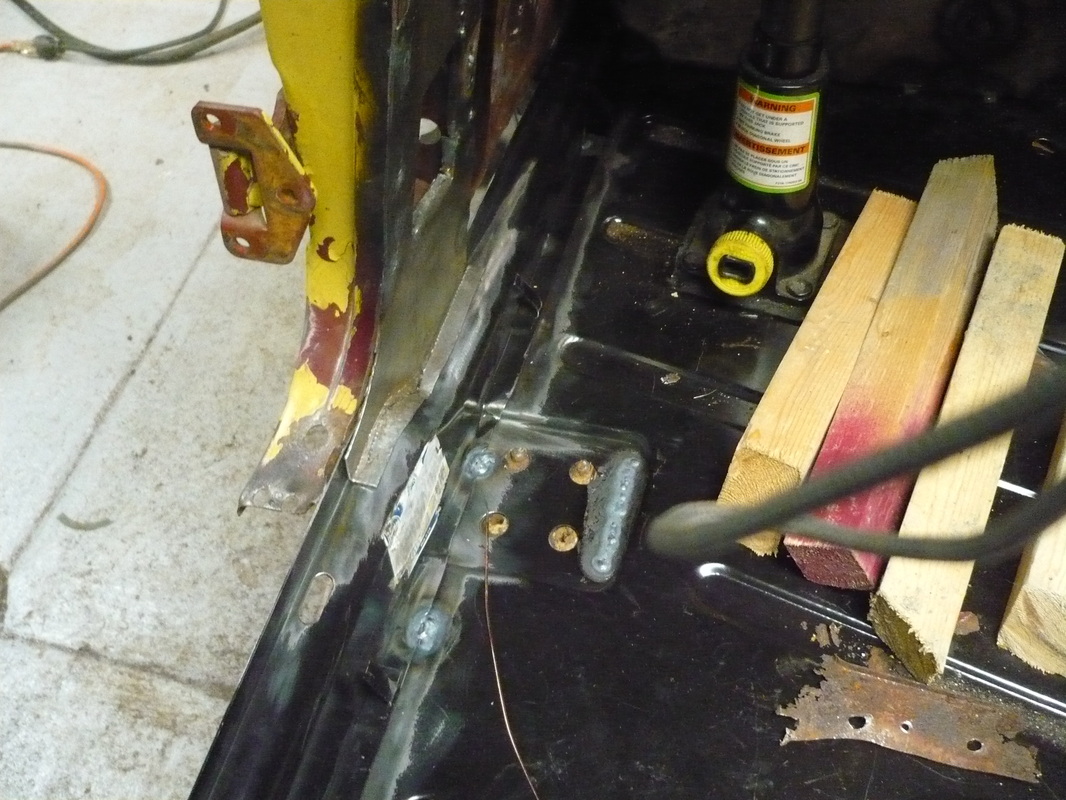
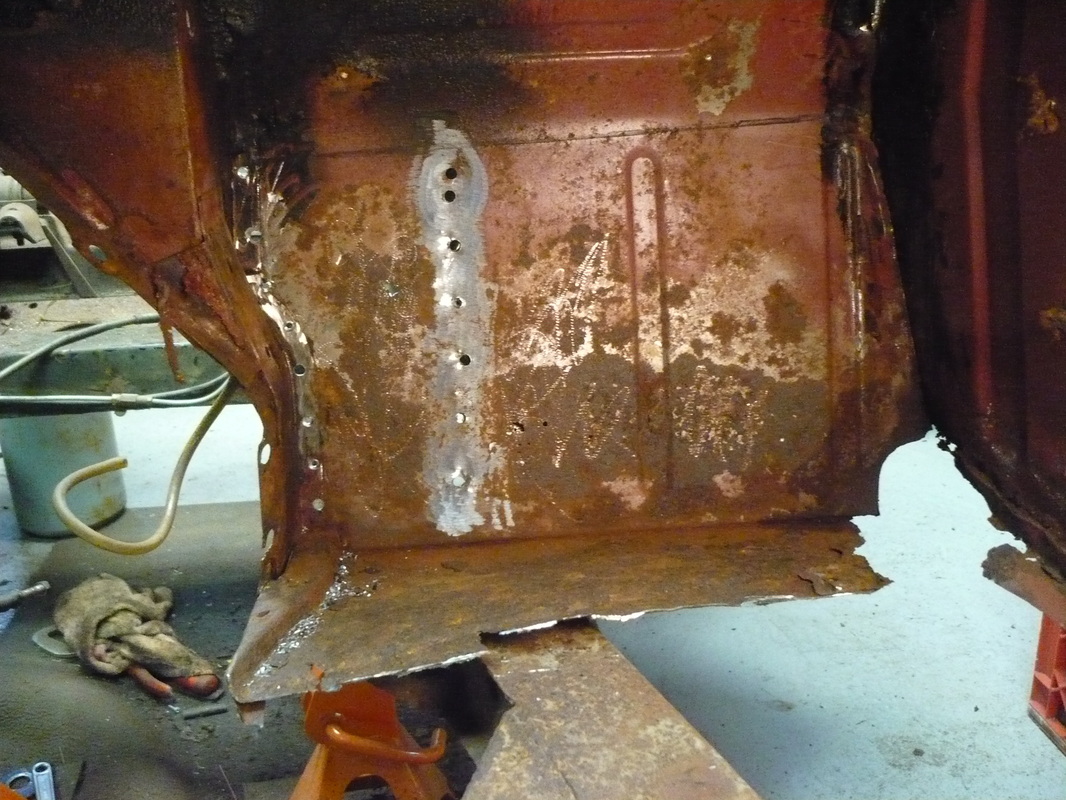
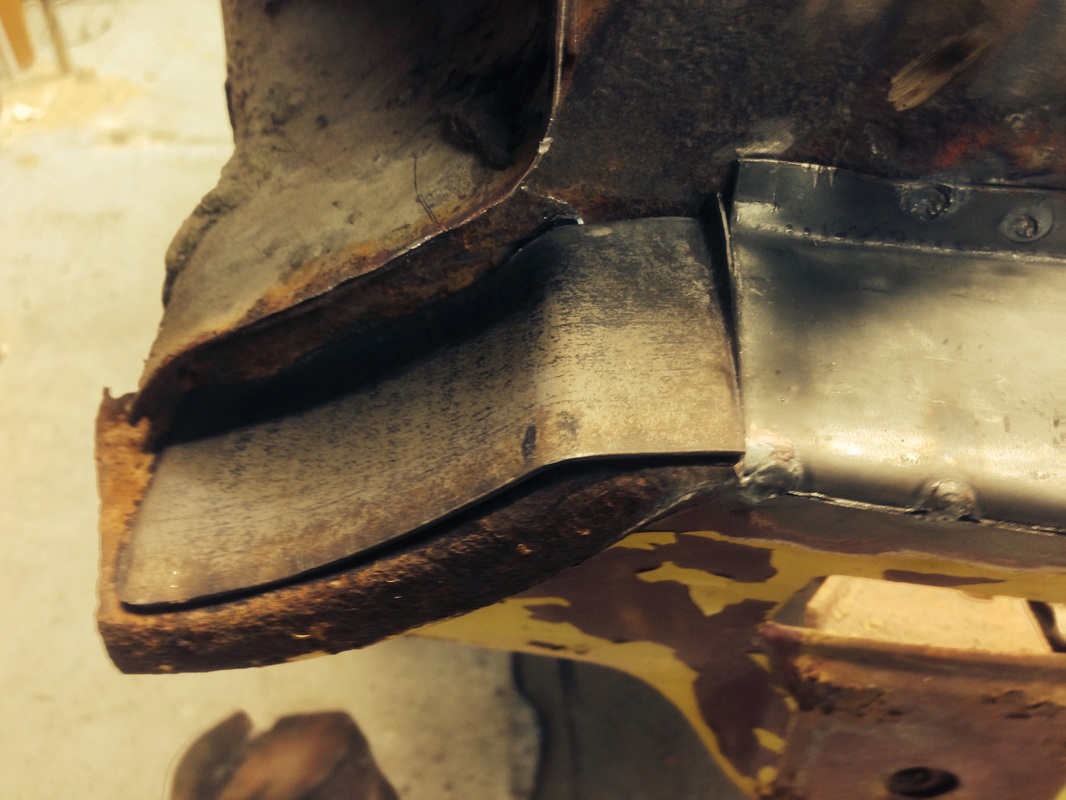
Guess what? The new floor panels were on back order... On to repairs of sheet metal that is adjacent to the floor. With the tub still attached to the frame at both ends, it kept the those ends pretty much in place. I still took many measurements at the top and bottom of each door opening between the A and B posts. These were written on the car in sharpie so I wouldn't misplace a piece of paper in the garage. Once dealing with some of the sheet metal around the driver's foot well, it became apparent that other attached pieces needed to be dealt with while in that area...and that led to another piece...and another... The following pictures show the original metal condition and how it was dealt with. Some of the pieces had compound curves which ate up a lot of time pounding and trimming before they could be welded into place. Edge repairs were made to the kick panels on both sides of the car. One of the major repair areas was where the left inner wing met the side panel, foot board, and the reinforcing panel that sits below the brake and clutch master cylinders. I imagine that decades of spilled brake fluid and grime created a great environment for rot.

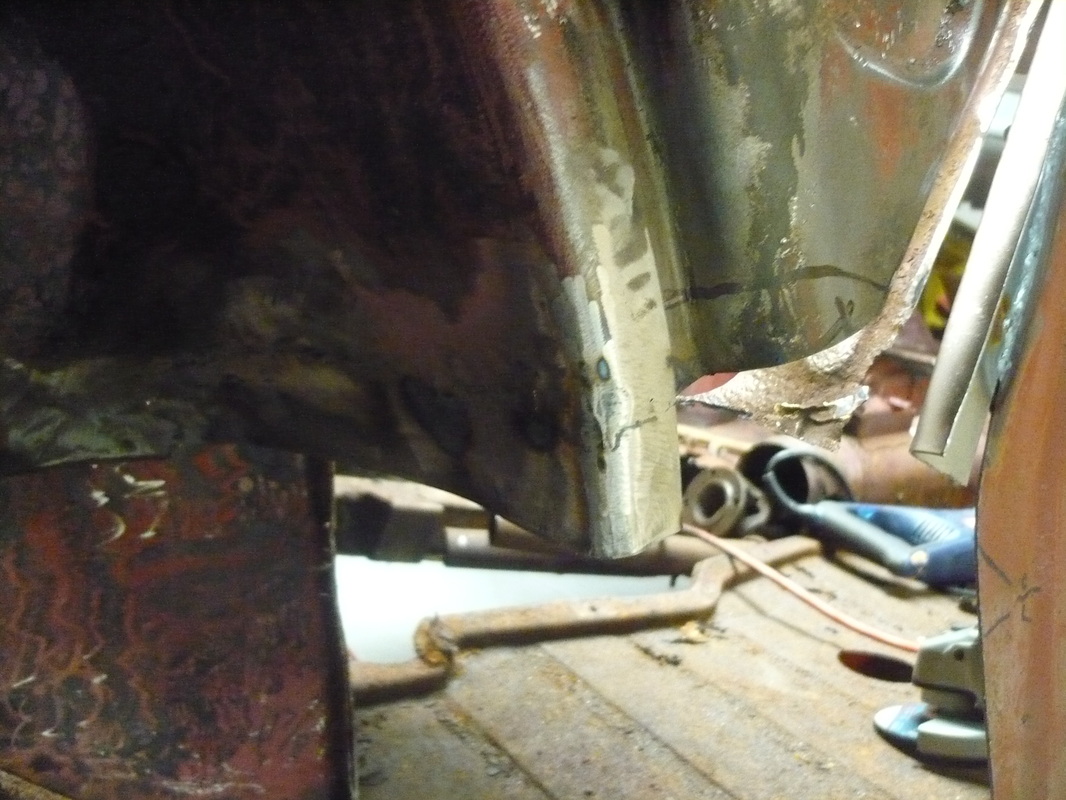
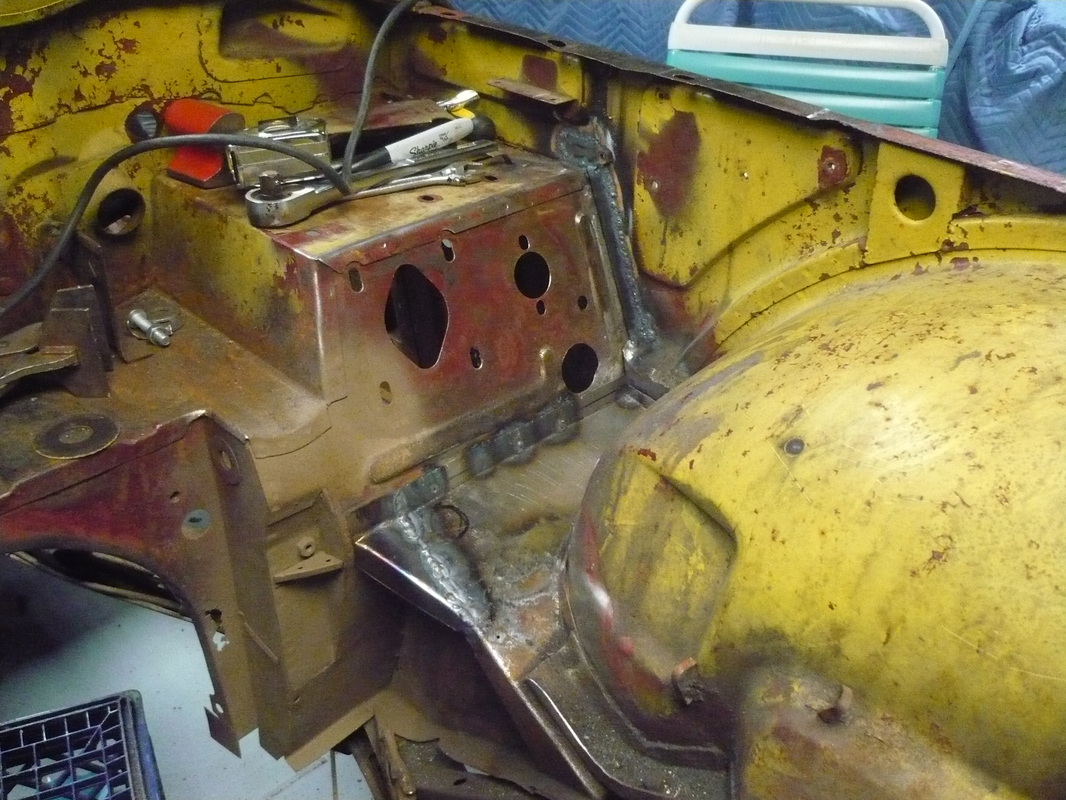
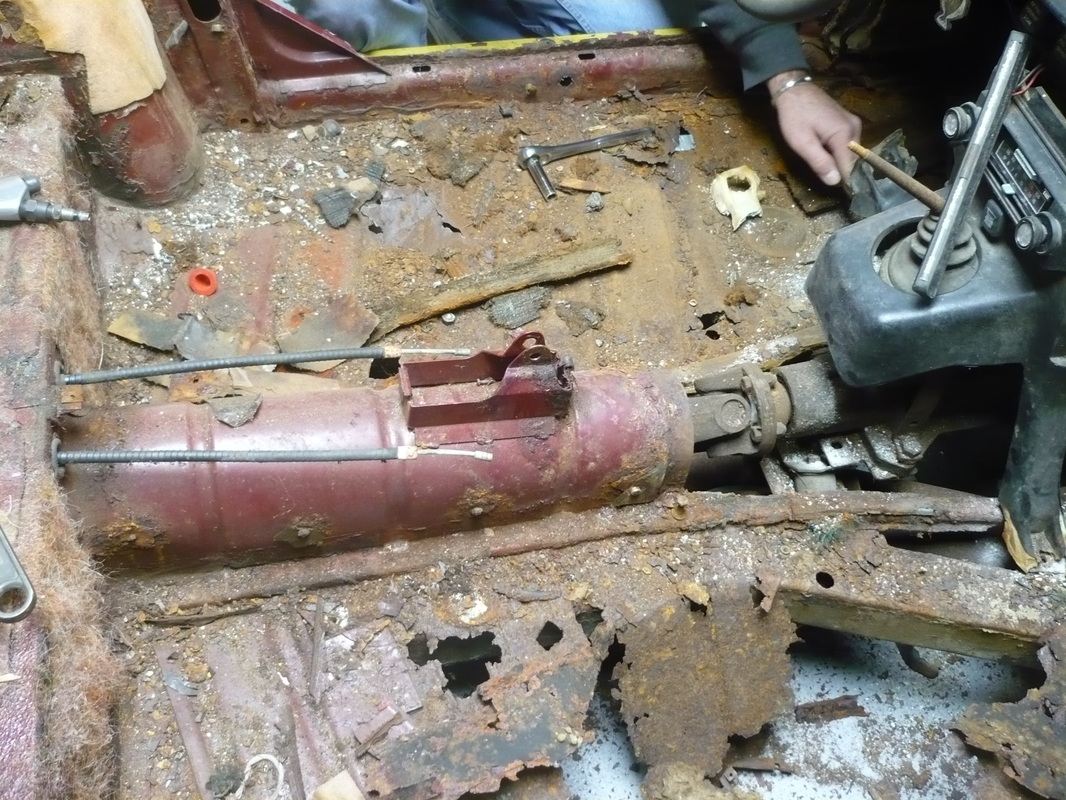
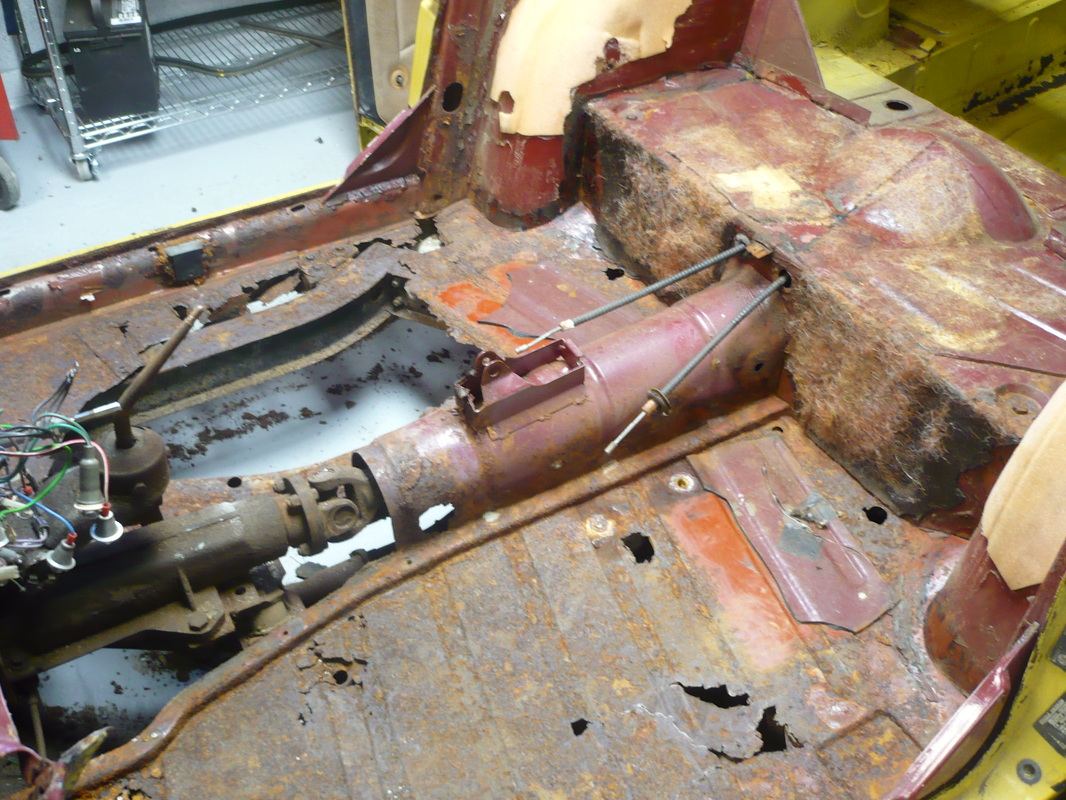
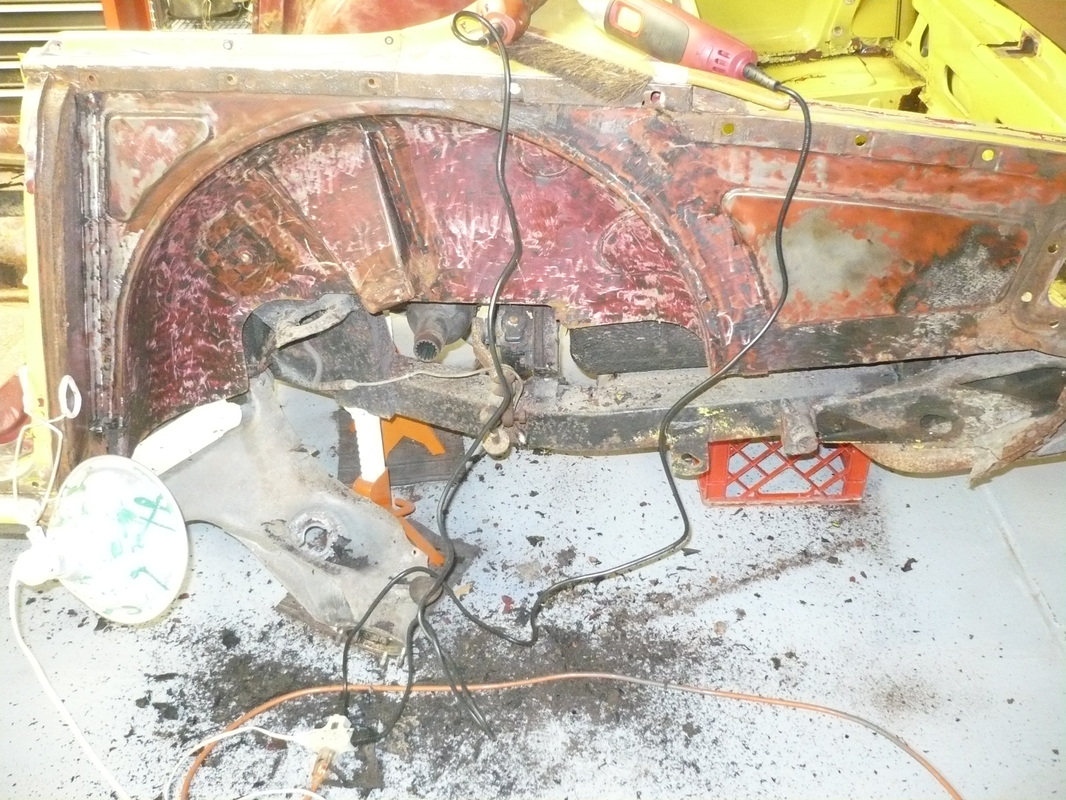
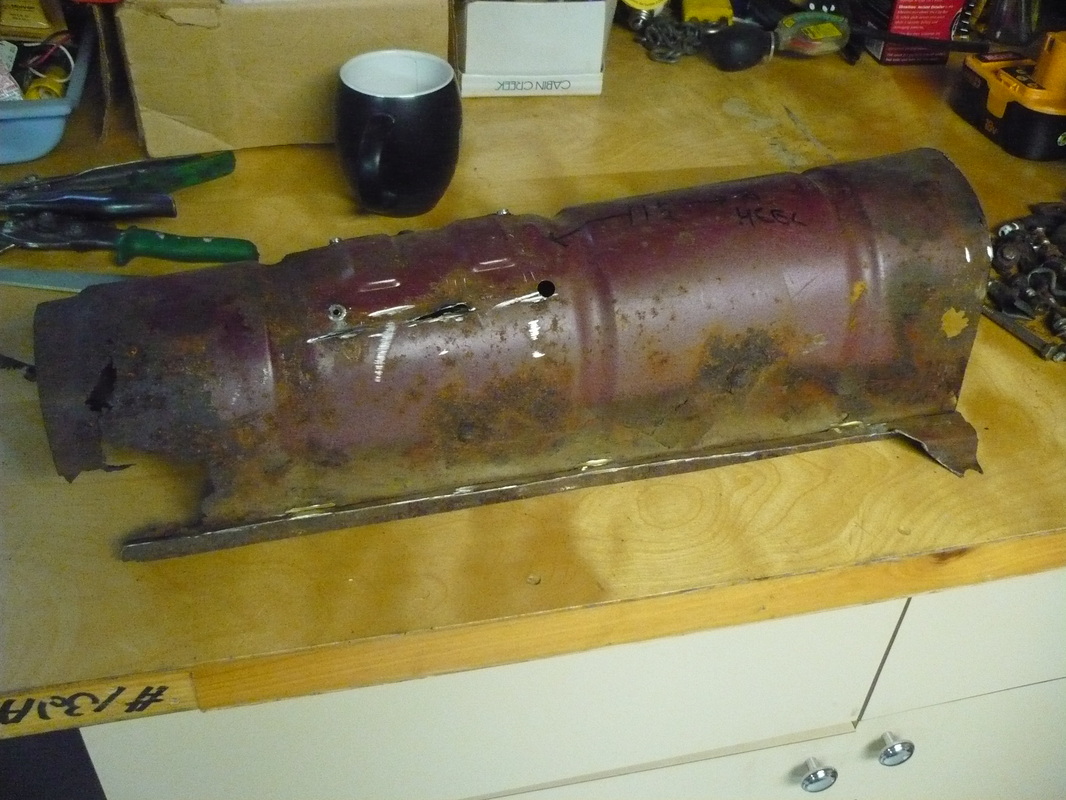
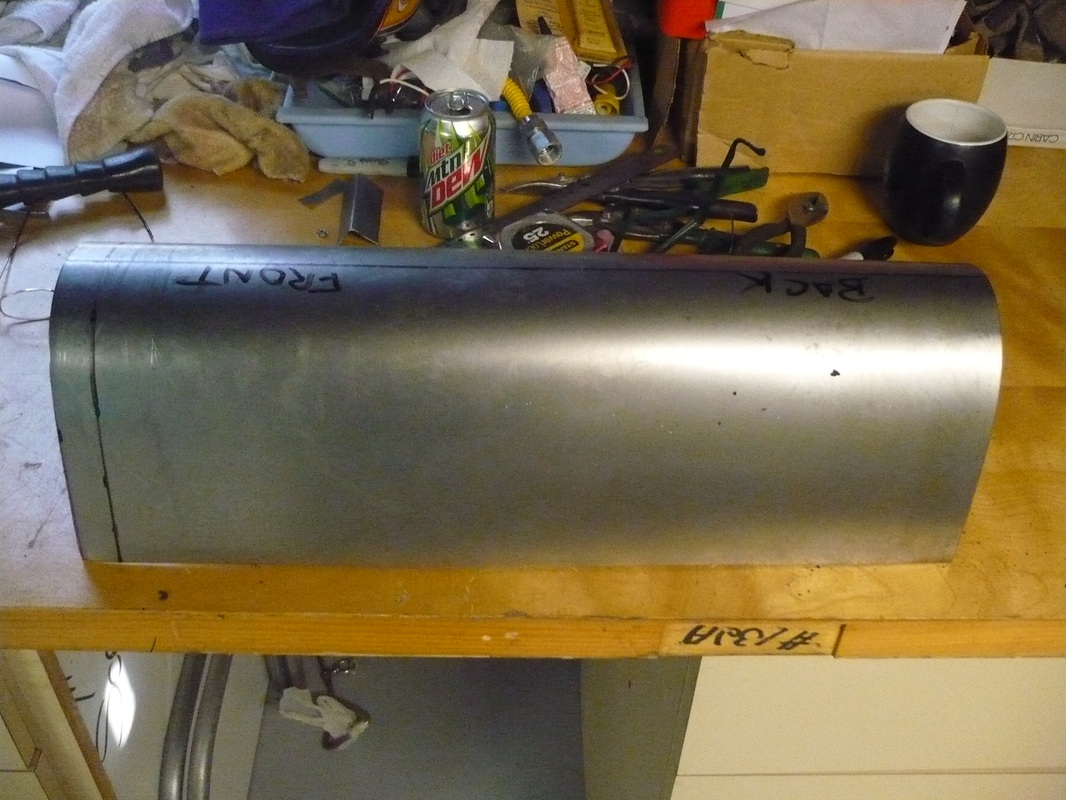
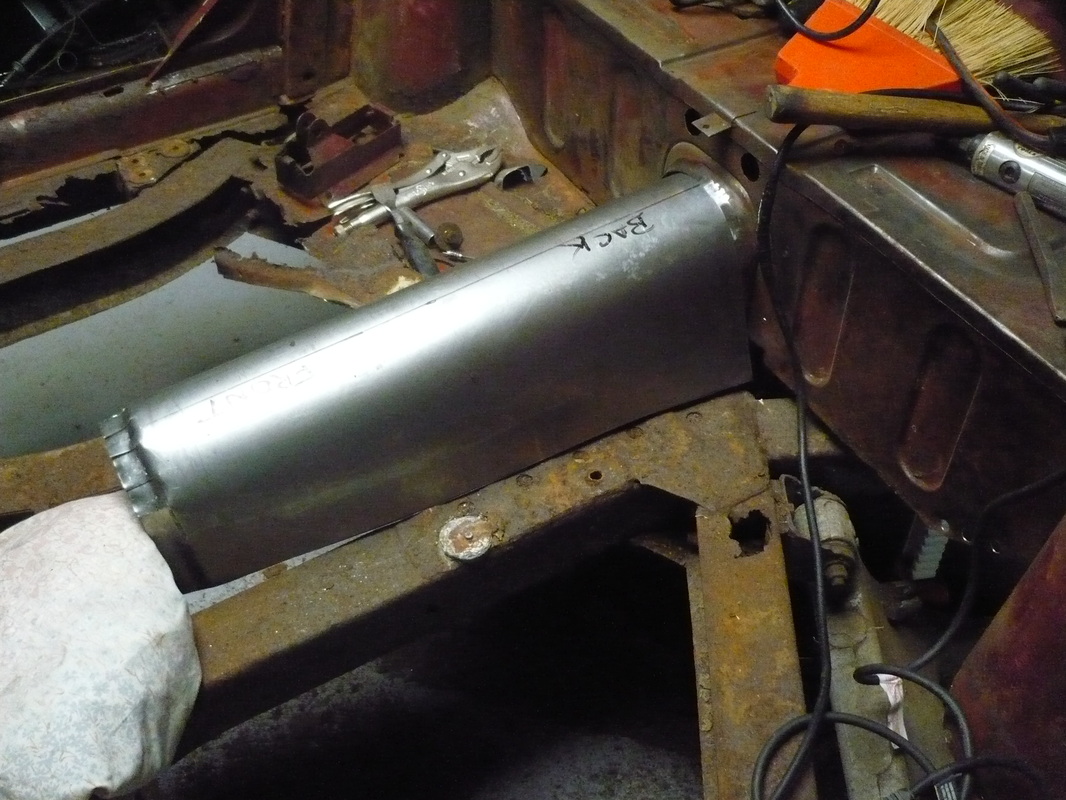
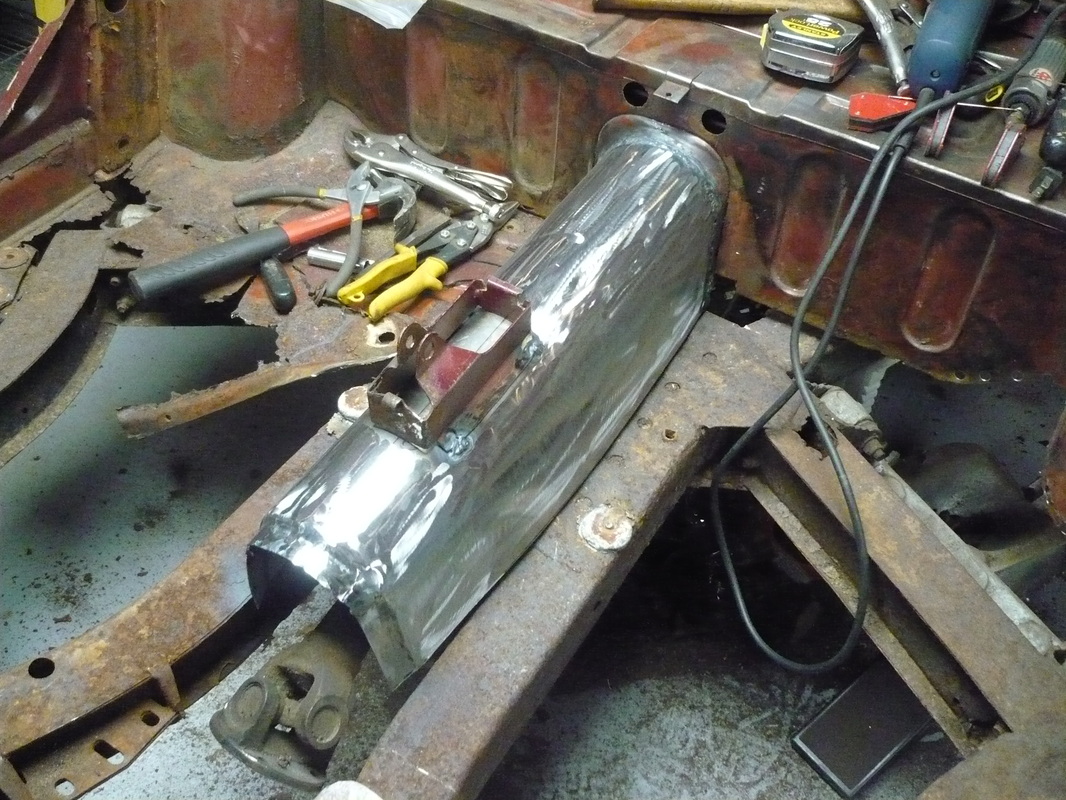
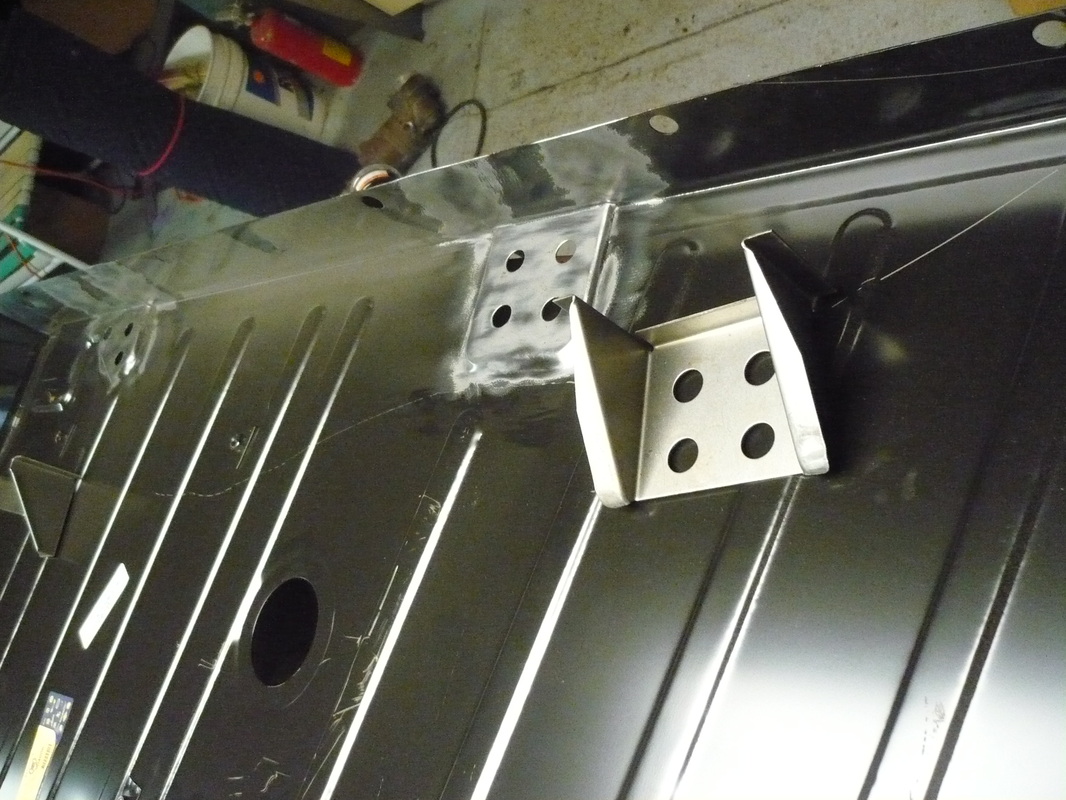
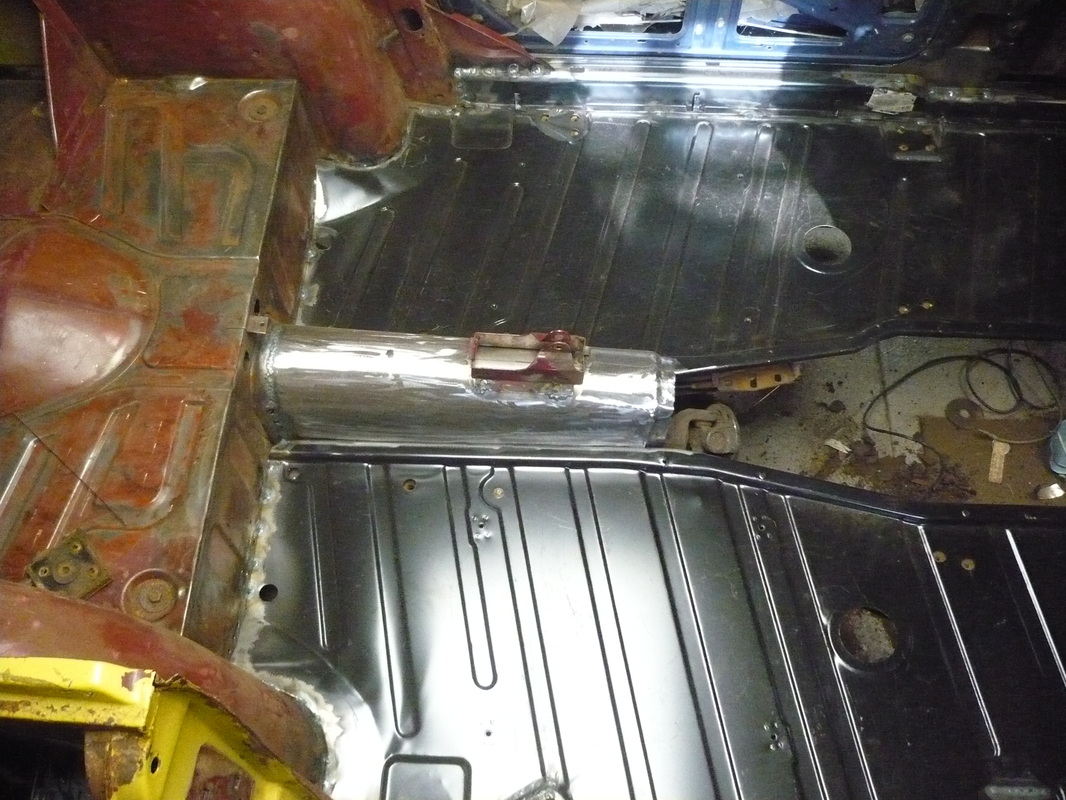
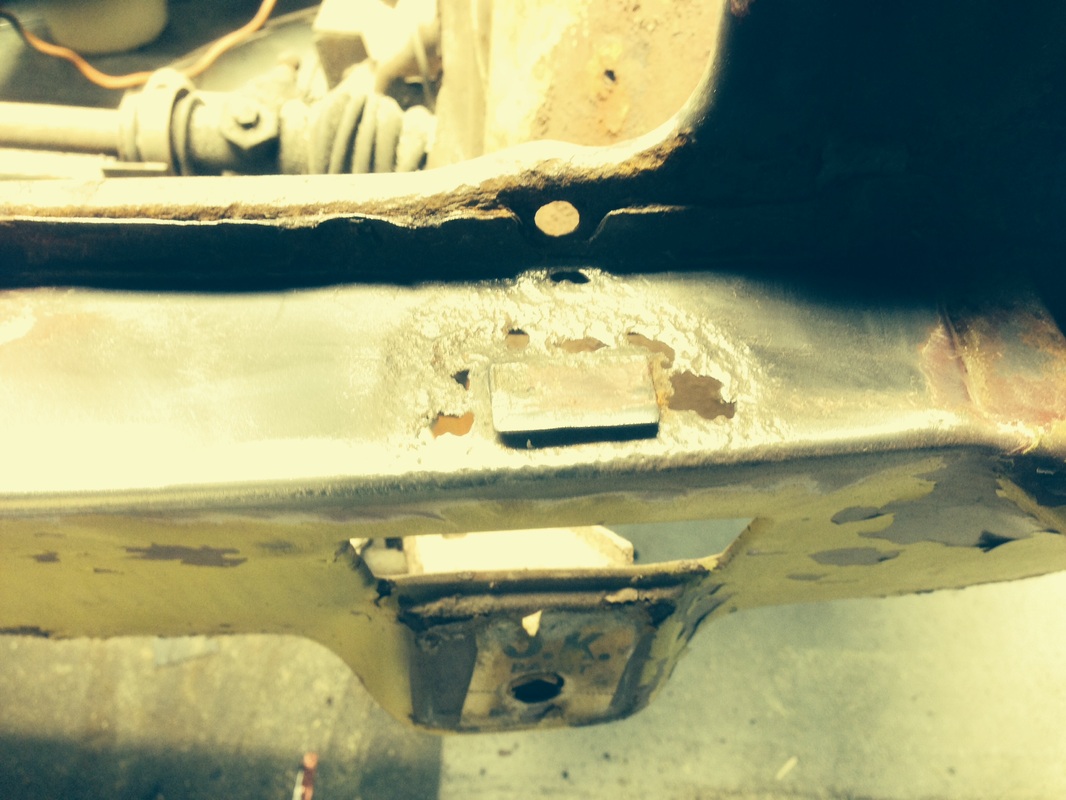
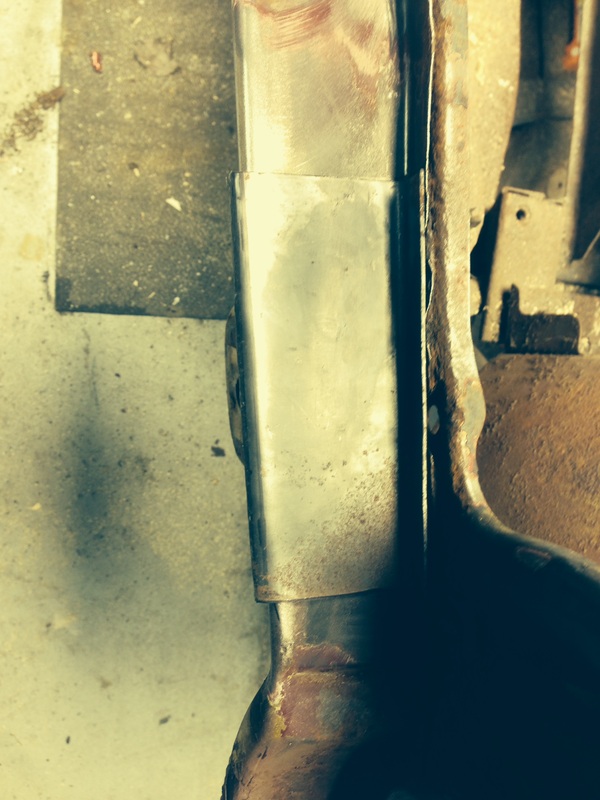
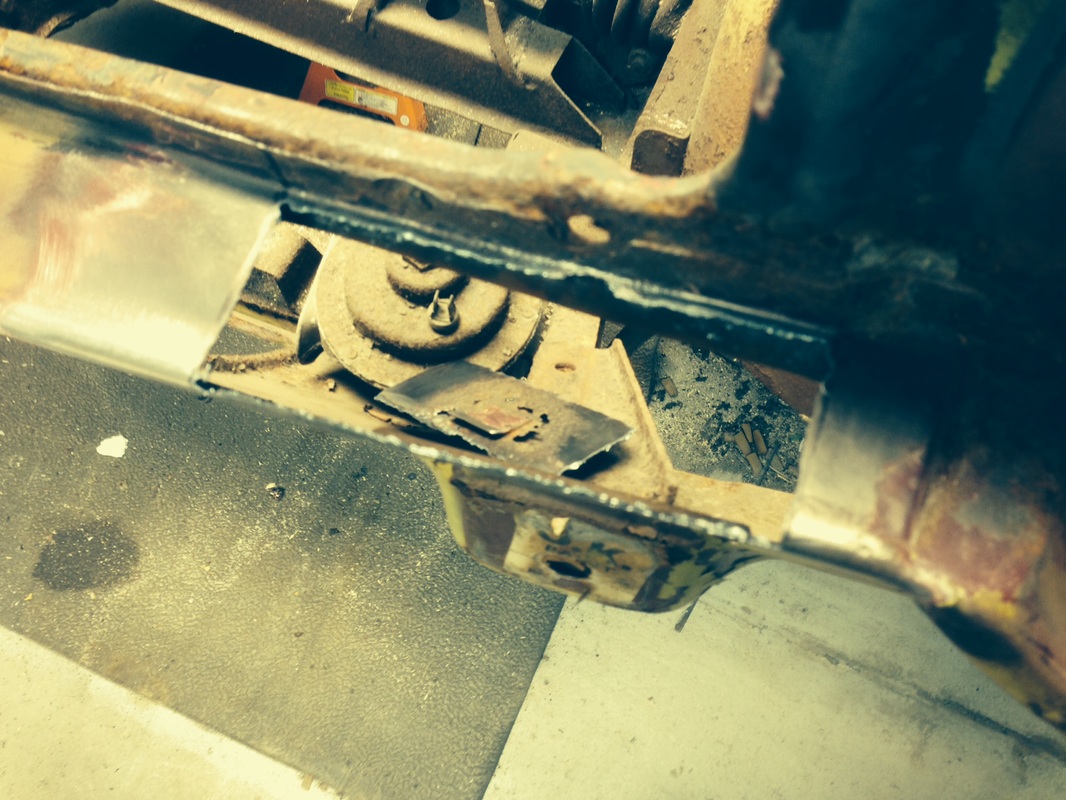
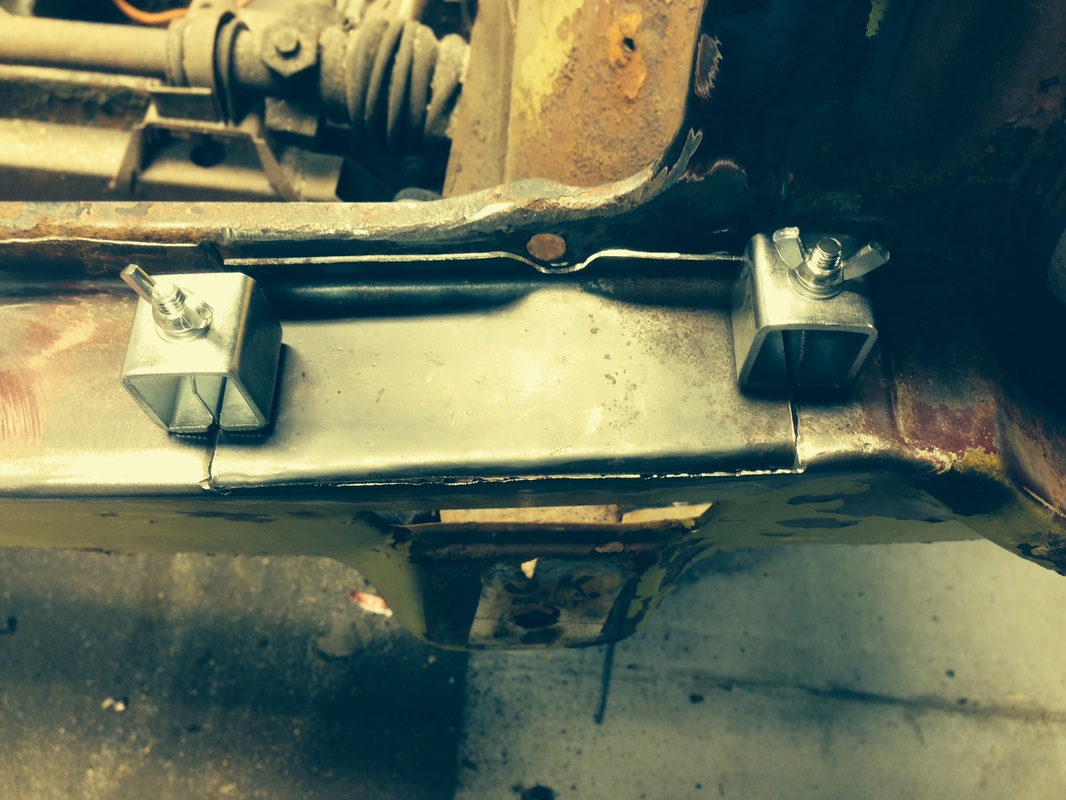
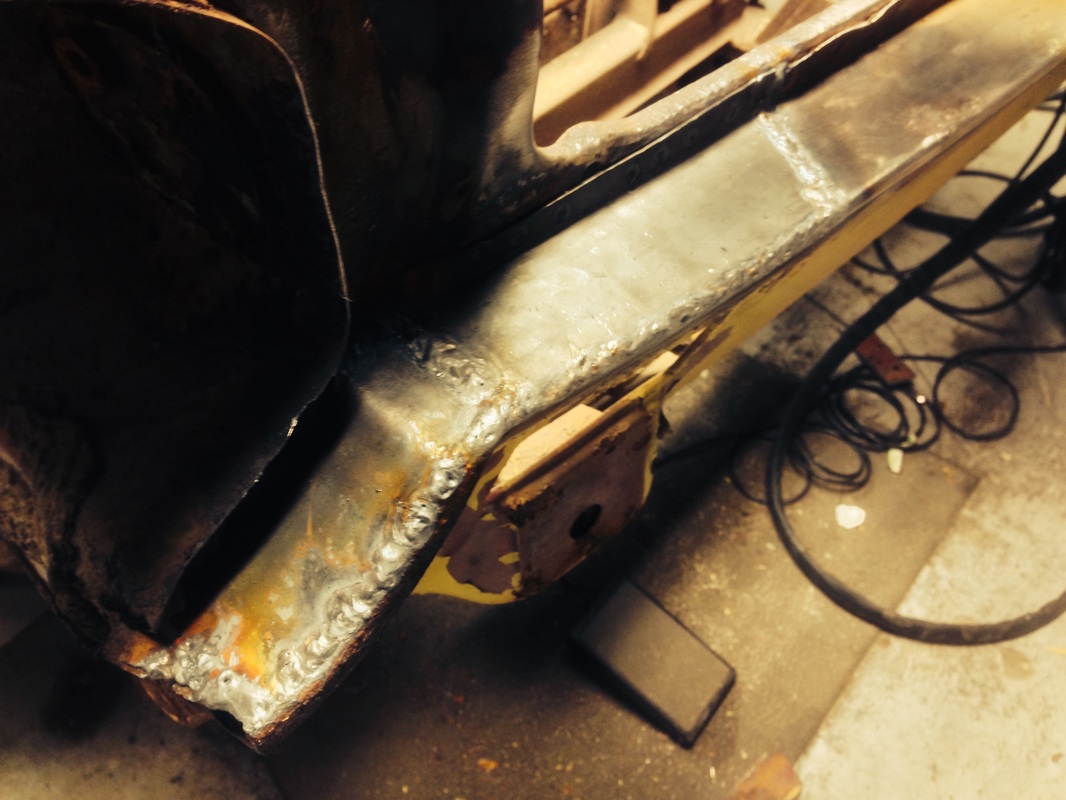
As the floors came out, we looked at the condition of the prop shaft tunnel. I judged it would be easier just to cut the old one out and fabricate a new one...out of a flat sheet of steel... This also required transitioning the emergency brake lever from the old cover to the new one. It can't be seen in the photos below but there is a hole in the right frame outrigger that pretty much matches the one pictured in the left outrigger.
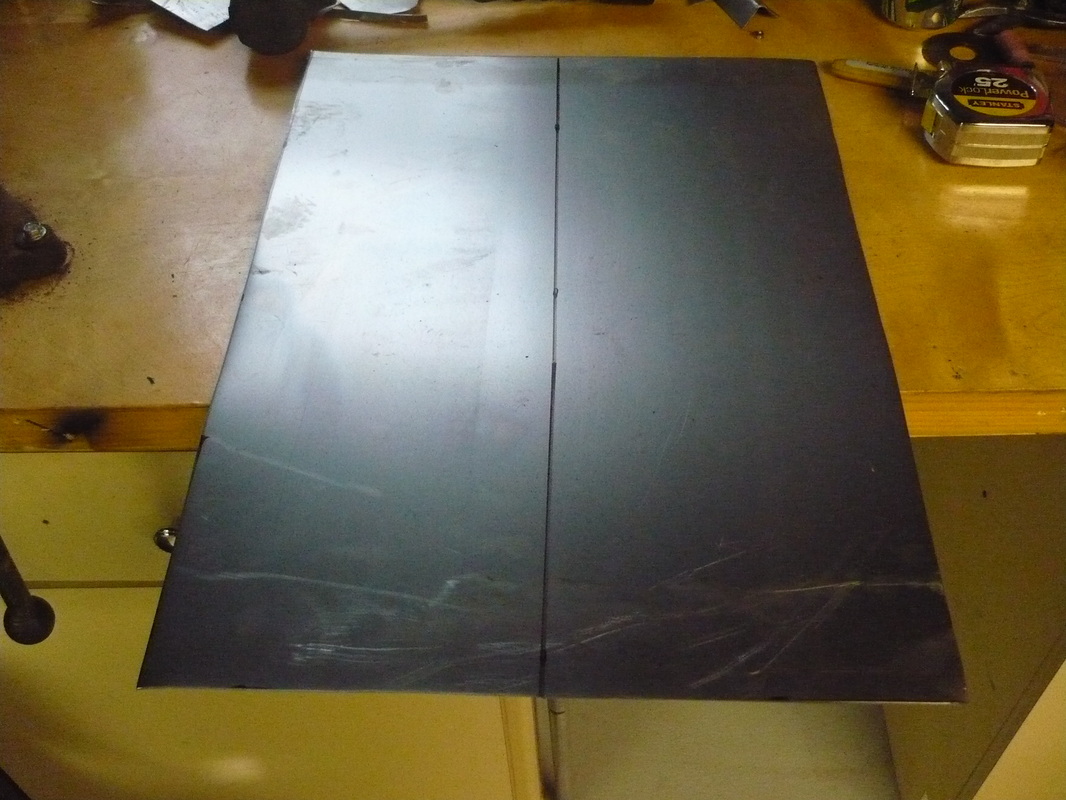
Did I tell you that I hate sheet metal work? With the amount of metal replacement this car needs and the break in work we've experienced to date, it just seems like it will never end. The one decision that was made early on was that the car would wind up being metal without any fiberglass and with minimal, if any, bondo. While upon expert concours inspection this car will not have "original" style metal panels in some places, I don't expect to enter any shows. Besides, with some of the improvements, it will be obvious it is non-stock upon casual view. Our goal here is to keep the basic car true to form with some performance, handling, safety, and reliability upgrades - we want to drive it and enjoy it like originally intended - not a trailer queen....
Did I tell you that I hate sheet metal work? With the amount of metal replacement this car needs and the break in work we've experienced to date, it just seems like it will never end. The one decision that was made early on was that the car would wind up being metal without any fiberglass and with minimal, if any, bondo. While upon expert concours inspection this car will not have "original" style metal panels in some places, I don't expect to enter any shows. Besides, with some of the improvements, it will be obvious it is non-stock upon casual view. Our goal here is to keep the basic car true to form with some performance, handling, safety, and reliability upgrades - we want to drive it and enjoy it like originally intended - not a trailer queen....


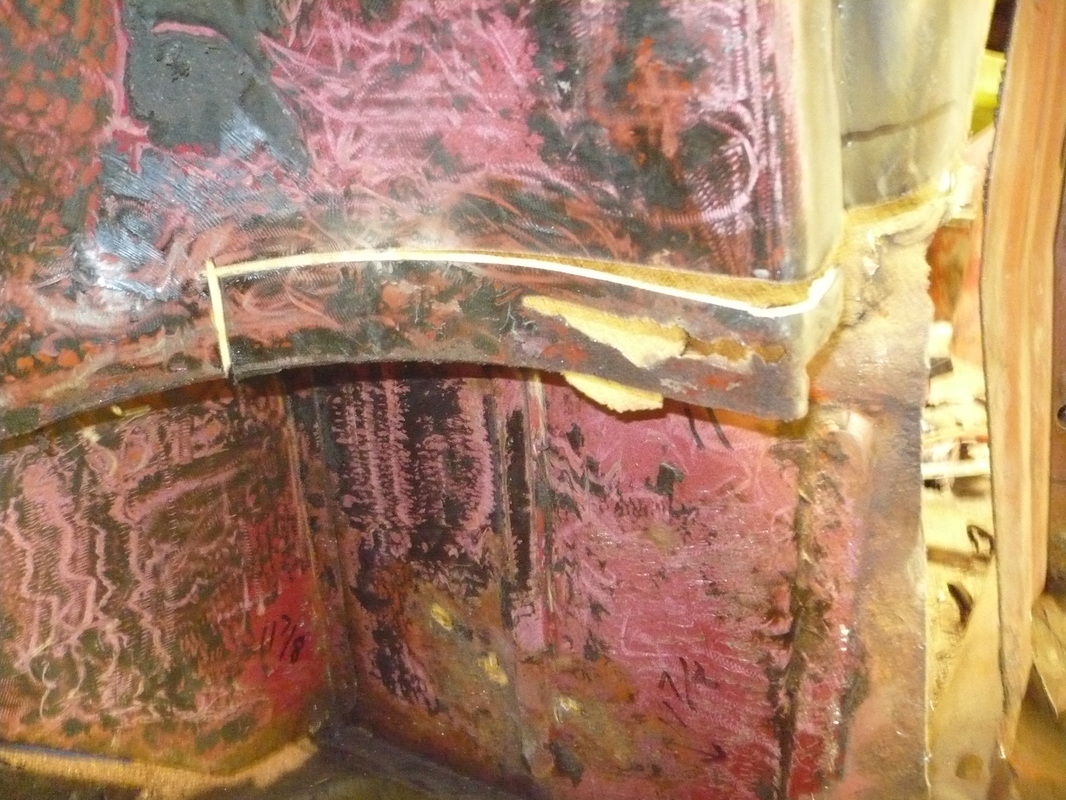
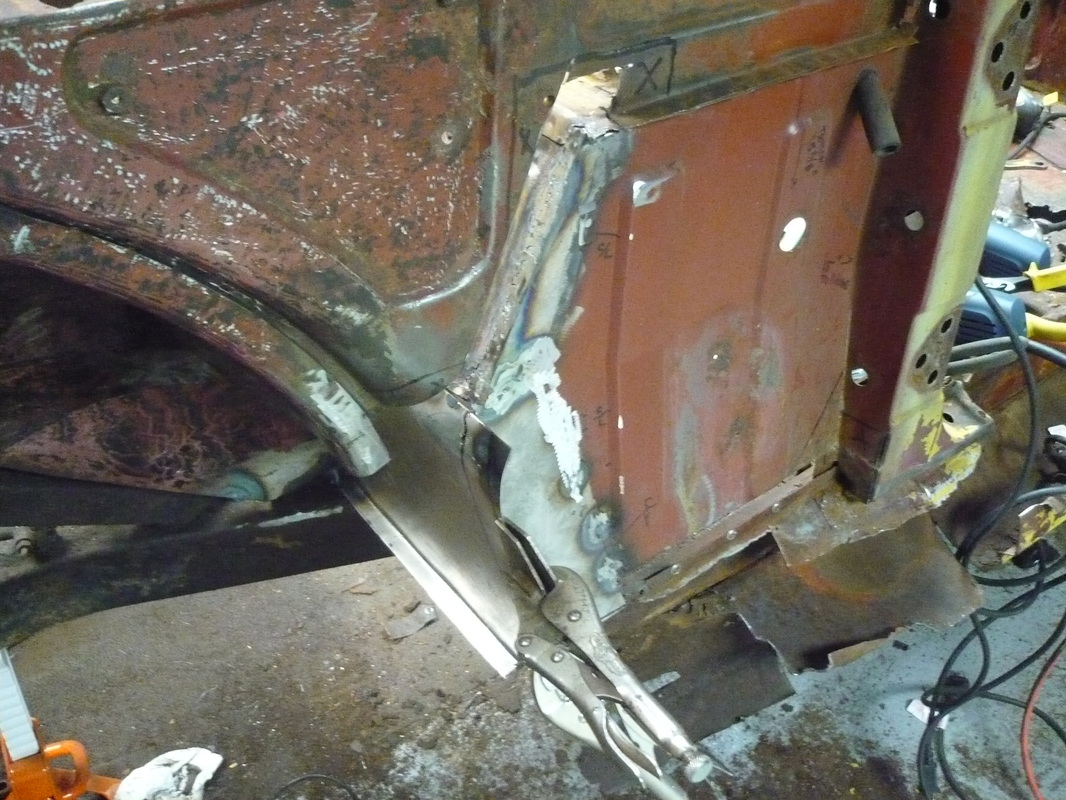
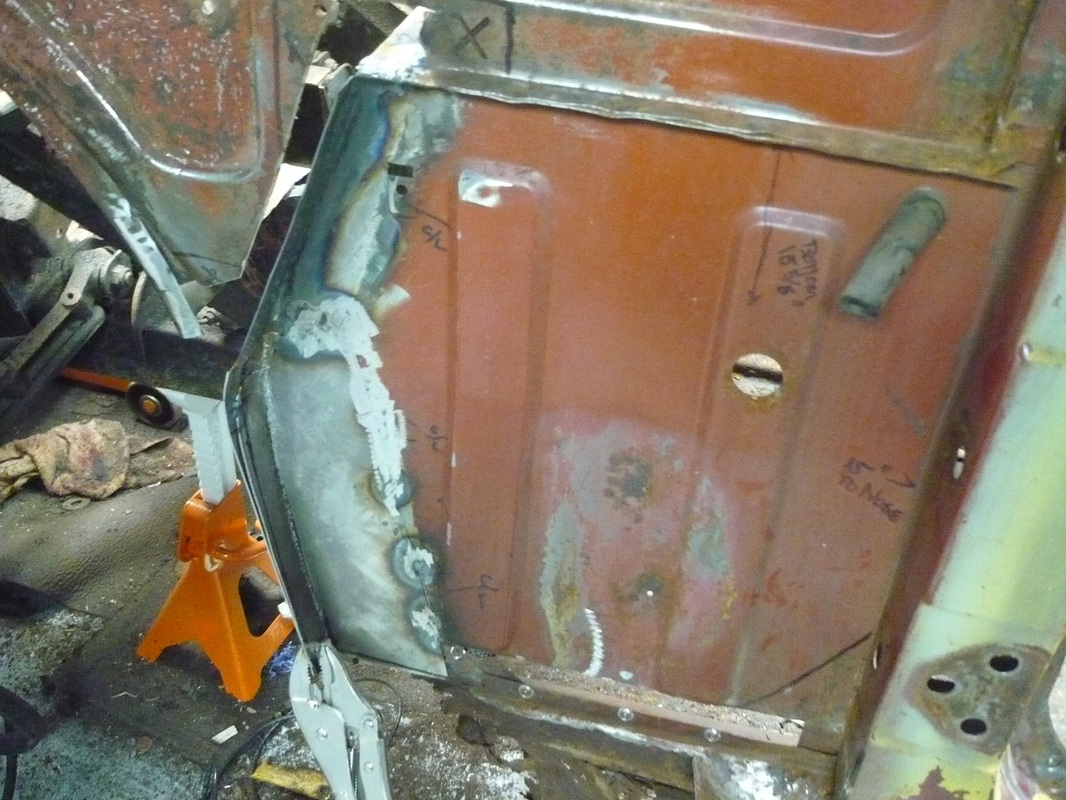
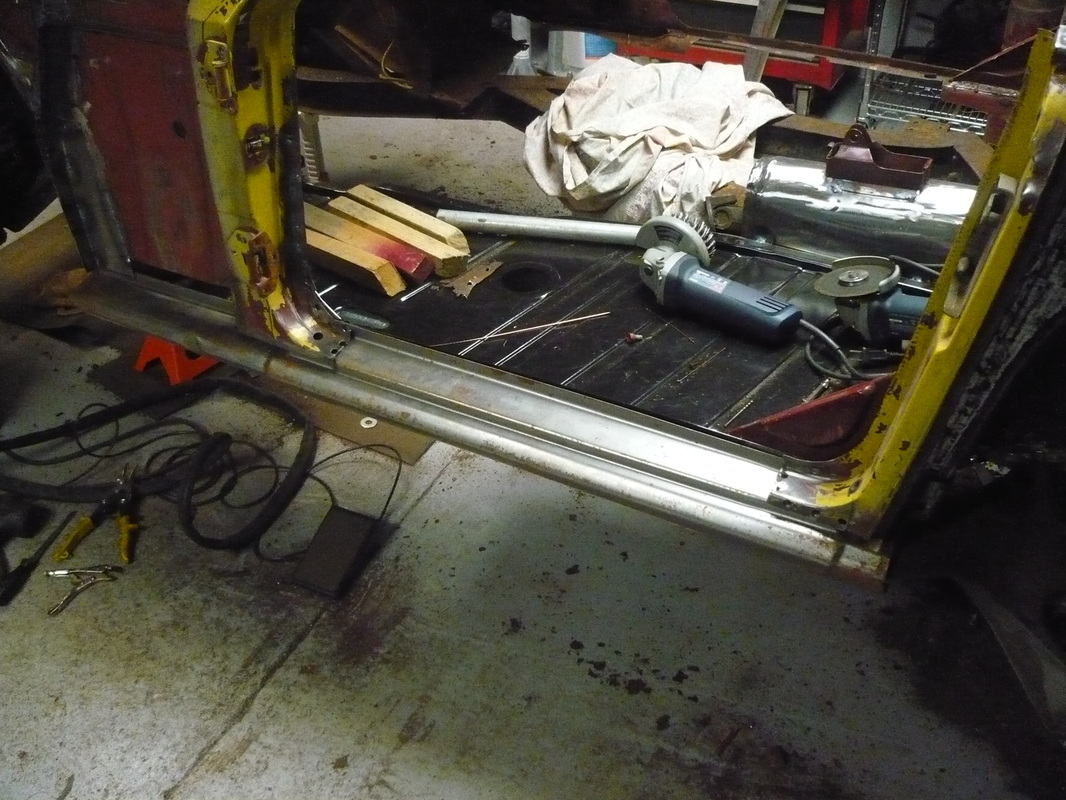
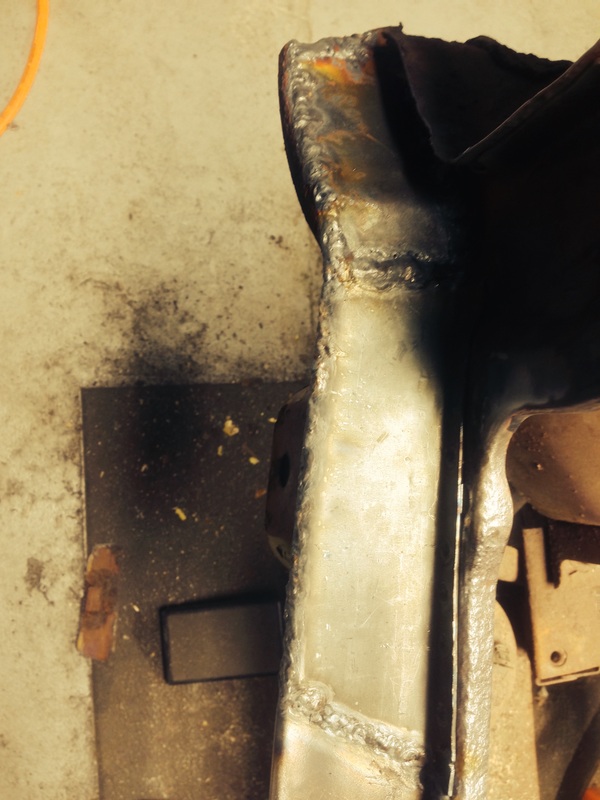
Okay...time to tackle the floors and sills... But first I had to repair the bottom of the drivers A post where it meets the upper inner sill as can be seen below. It was just the inner skin but pretty complex considering the access hole for the door hinge bolts and the compound lip where it mates to the sill. The earlier A/B post measurements were crucial when attaching the upper inner sill as this set the door aperture width at the bottom. The upper aperture width can be adjusted later with creative body mounting shim work. As mentioned in many texts, I'm a believer that it is all about rebuilding the tub around the doors.

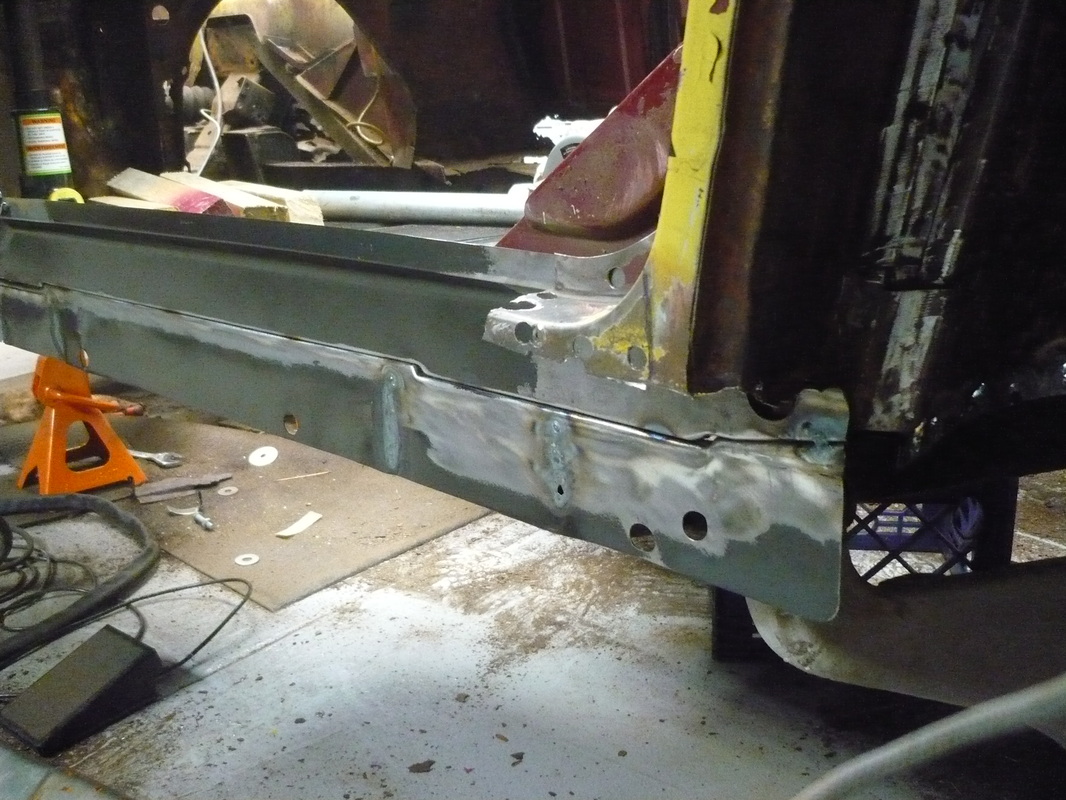
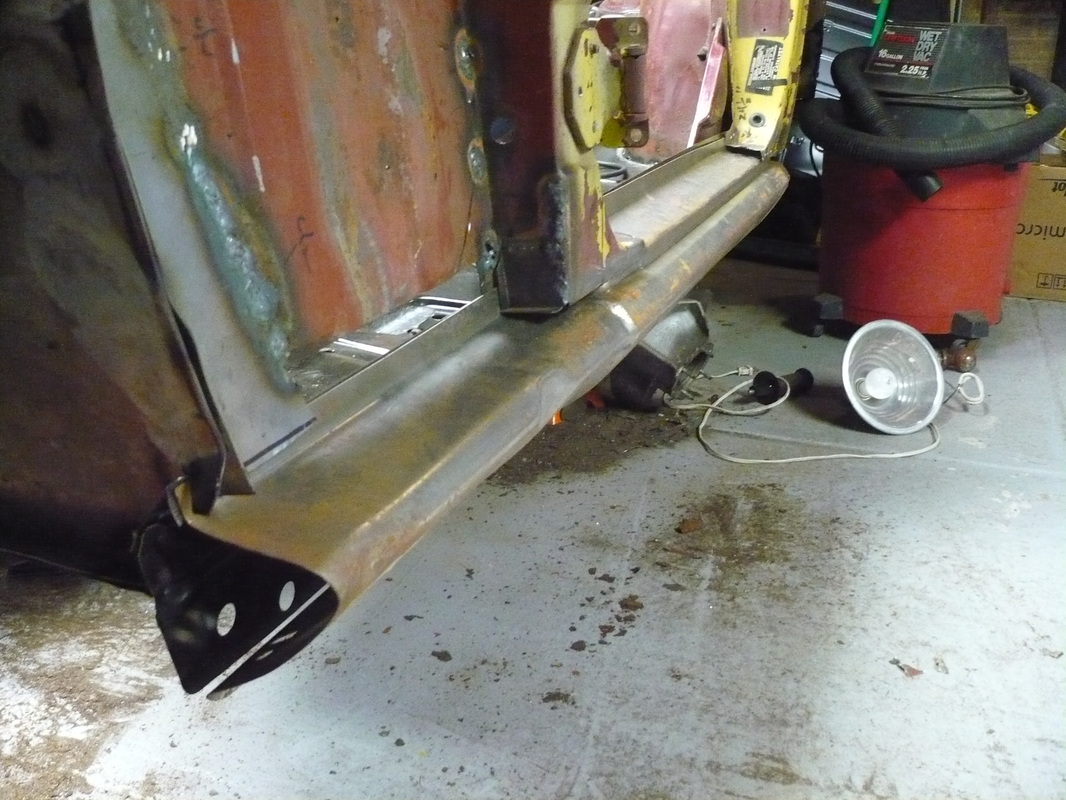
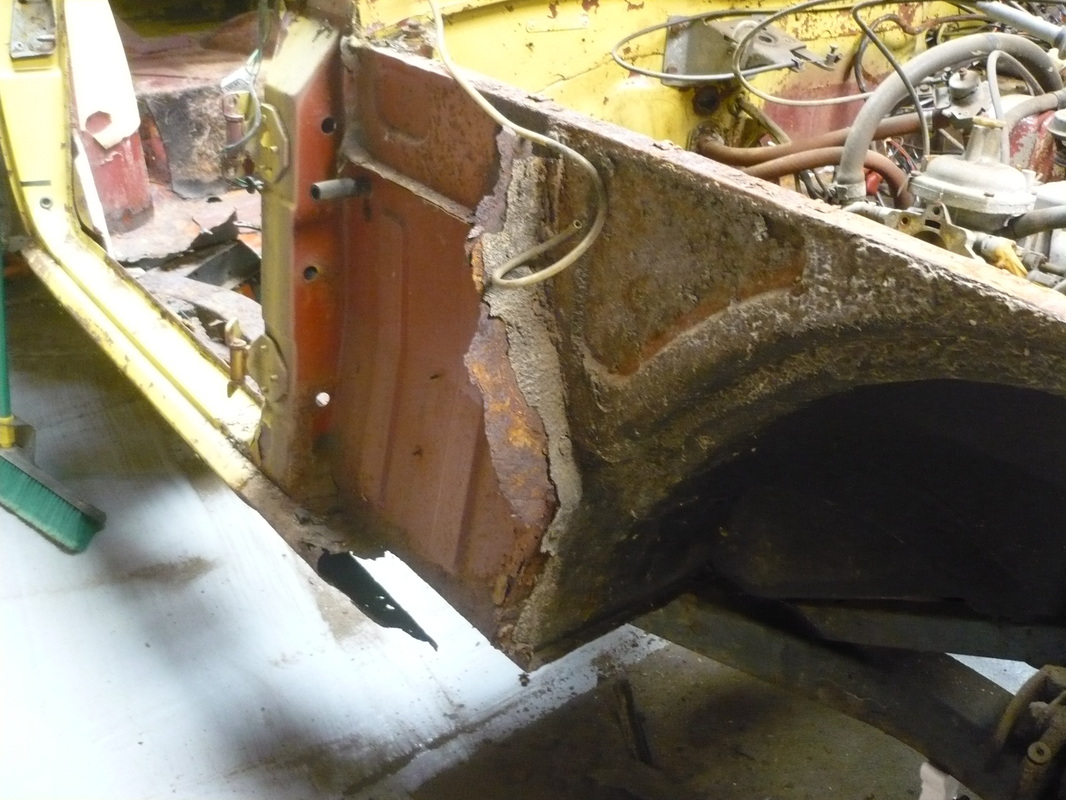
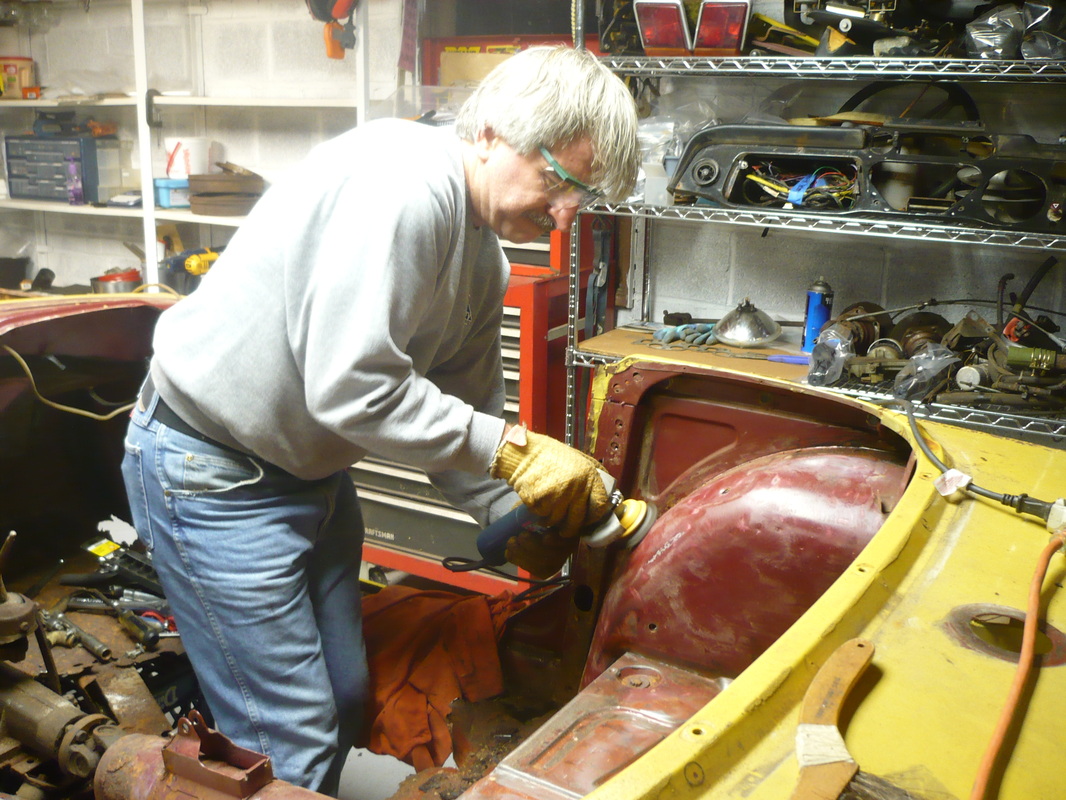
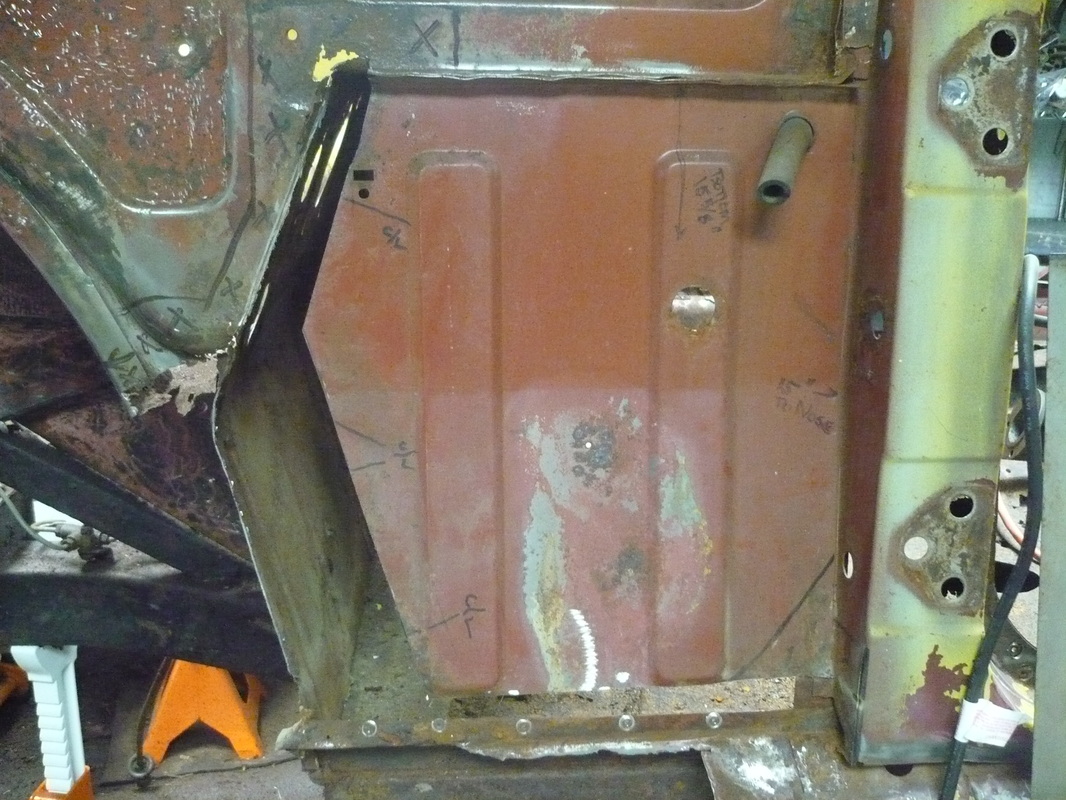
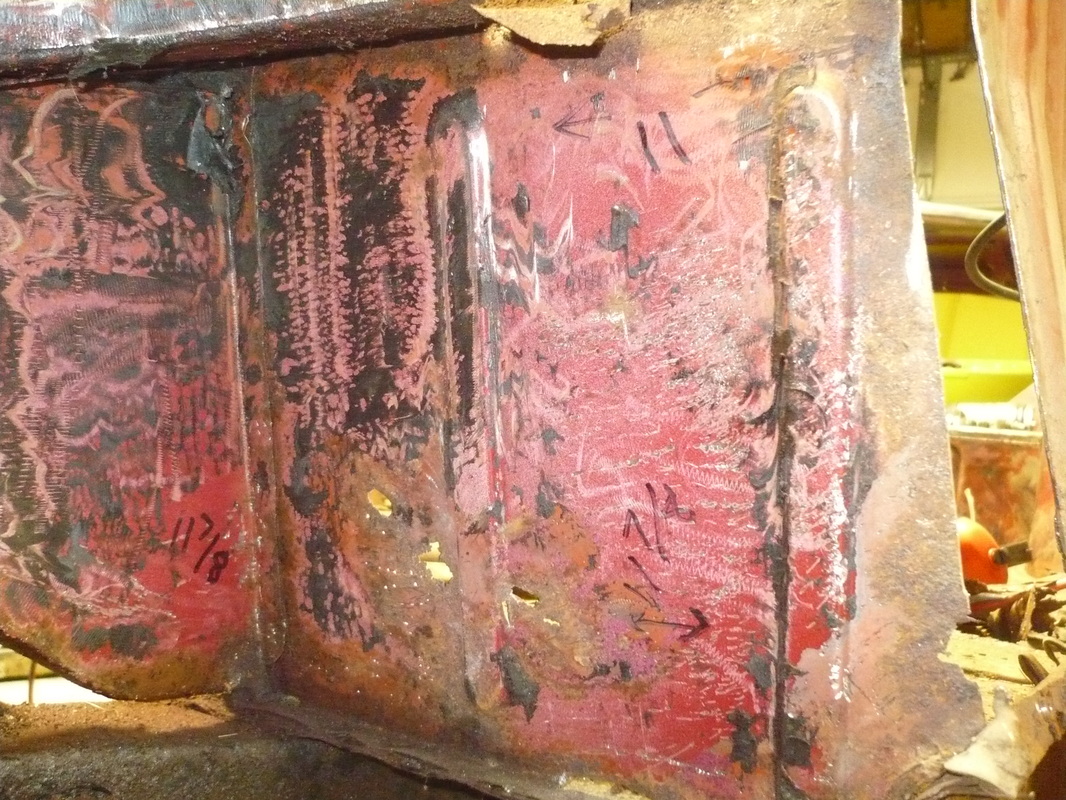
Next was the passenger side floor along with the prerequisite foot well work.... The floors also need the frame mounting area reinforcements welded on prior to installing. Again, some edge repair was done on the side panel but the passenger side was in better shape than the driver's.
At this point, the car basically sat untouched for about two years while other priorities came and went. During this time I did snag an old Toyota Celica 5-speed for the planned HVDA transmission conversion. I also picked up a 97-01 Infinity Q45 5-bolt VLSD unit with a 3.69:1 gear ratio that is also planned along with the mounting kit and heavy duty axles and hubs from Richard Good. A Megasquirt EFI system is planned for the car and I've picked up a blank fuel rail, injectors, throttle body, and some aluminum stock to fabricate most of the intake manifold. Plans have also been pretty much set to convert the front brakes over to 79-84 Toyota 4X4 calipers and the rear to disc brakes using Maxima calipers and 240SX discs. I have yet to acquire any of those pieces. I will need to pick up the rear brake items soon as I will need to mock-up, fabricate, and weld caliper mounting brackets to the rear trailing arms.
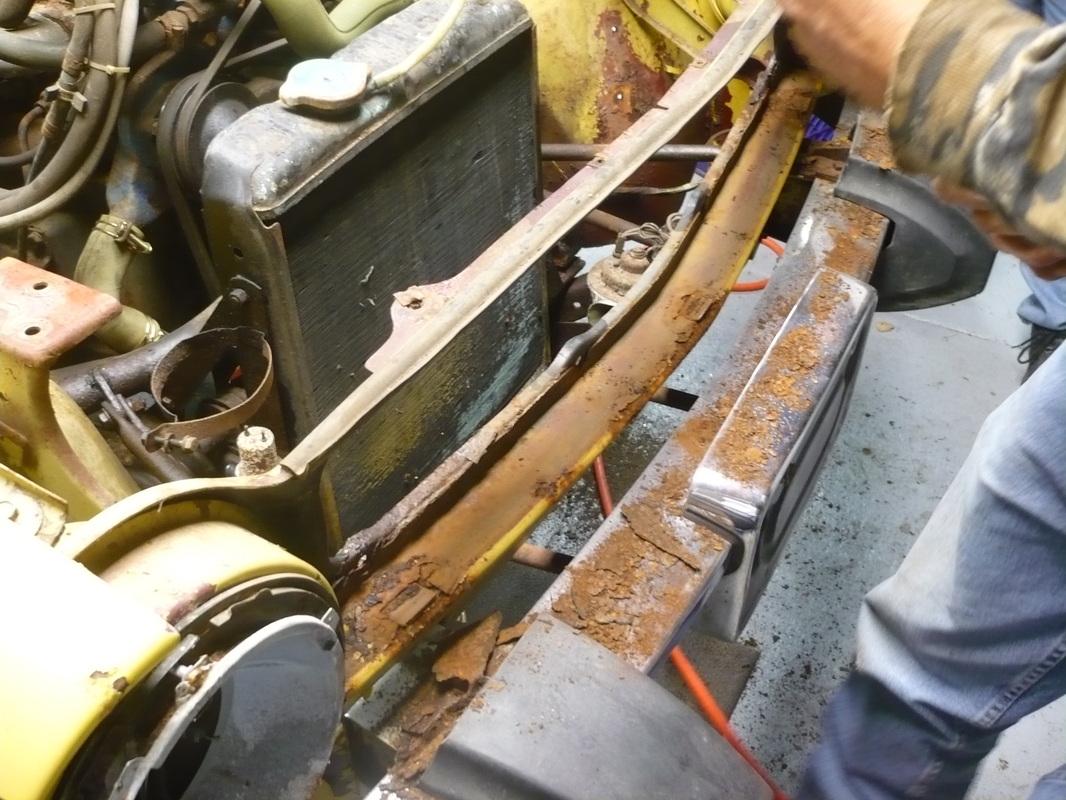
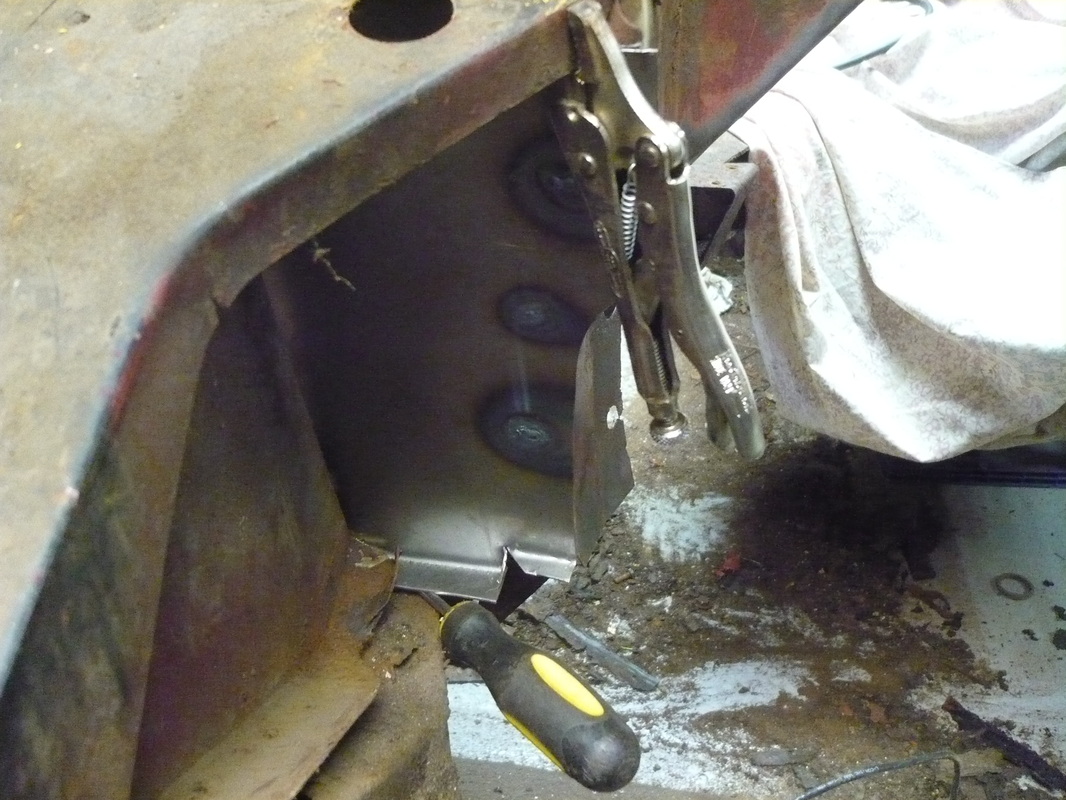
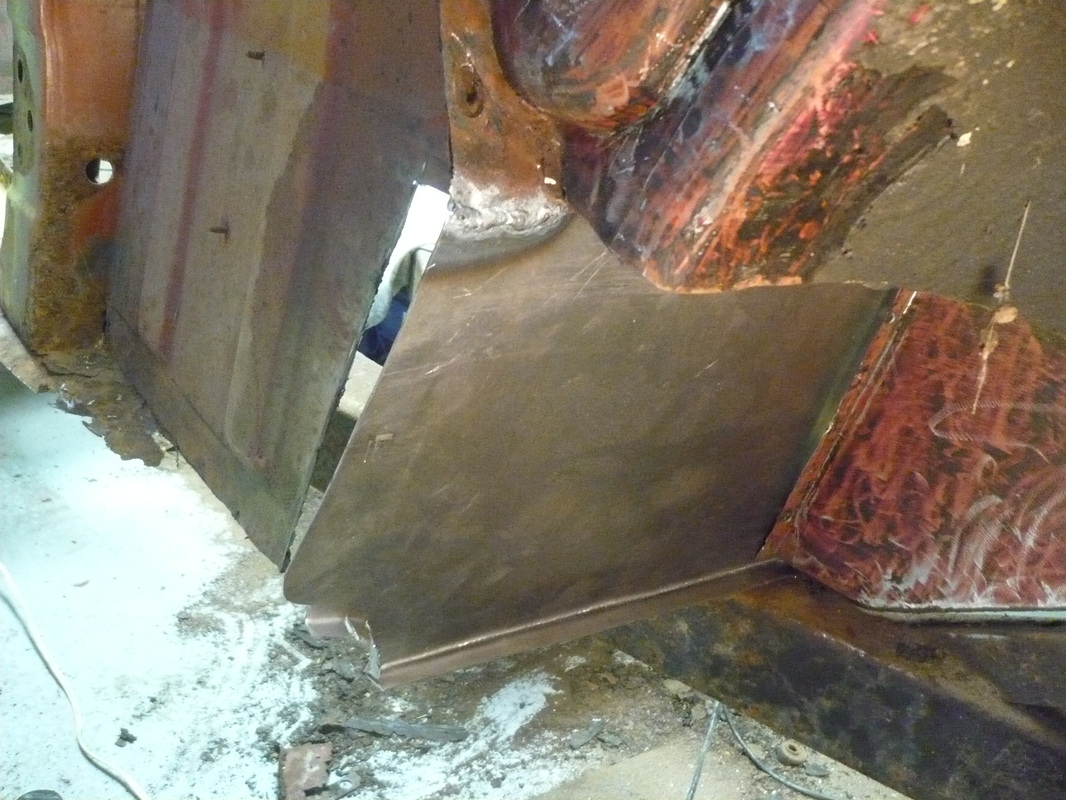
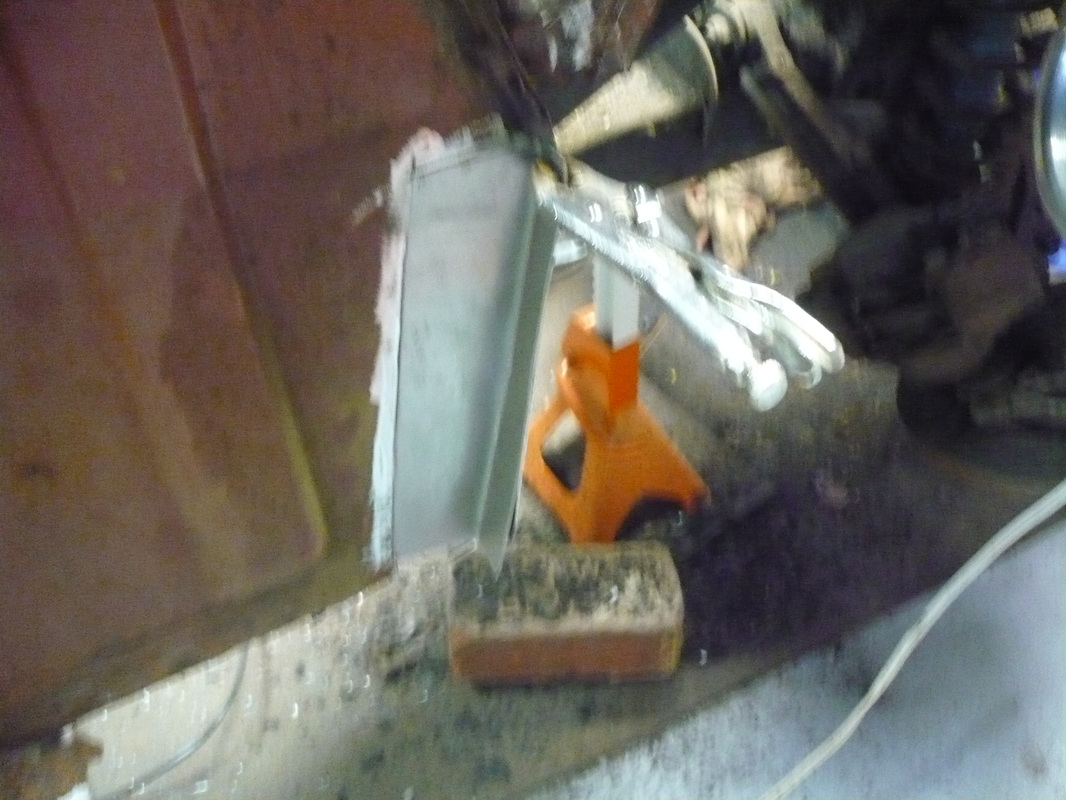
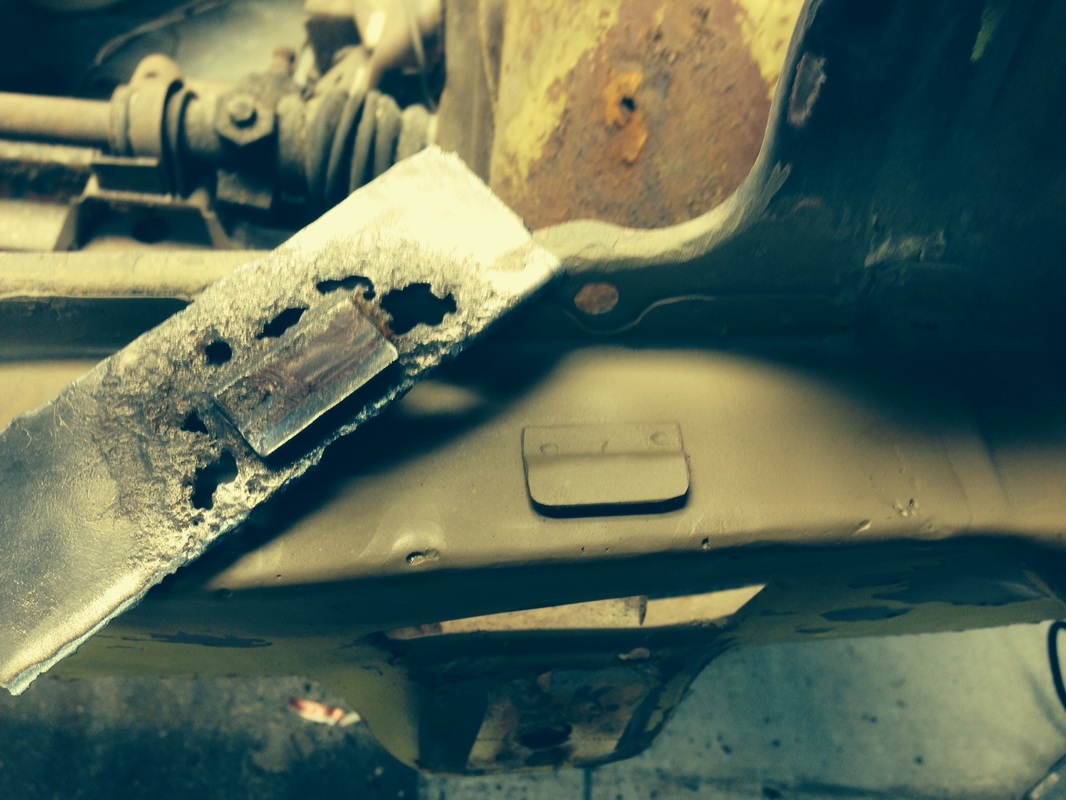
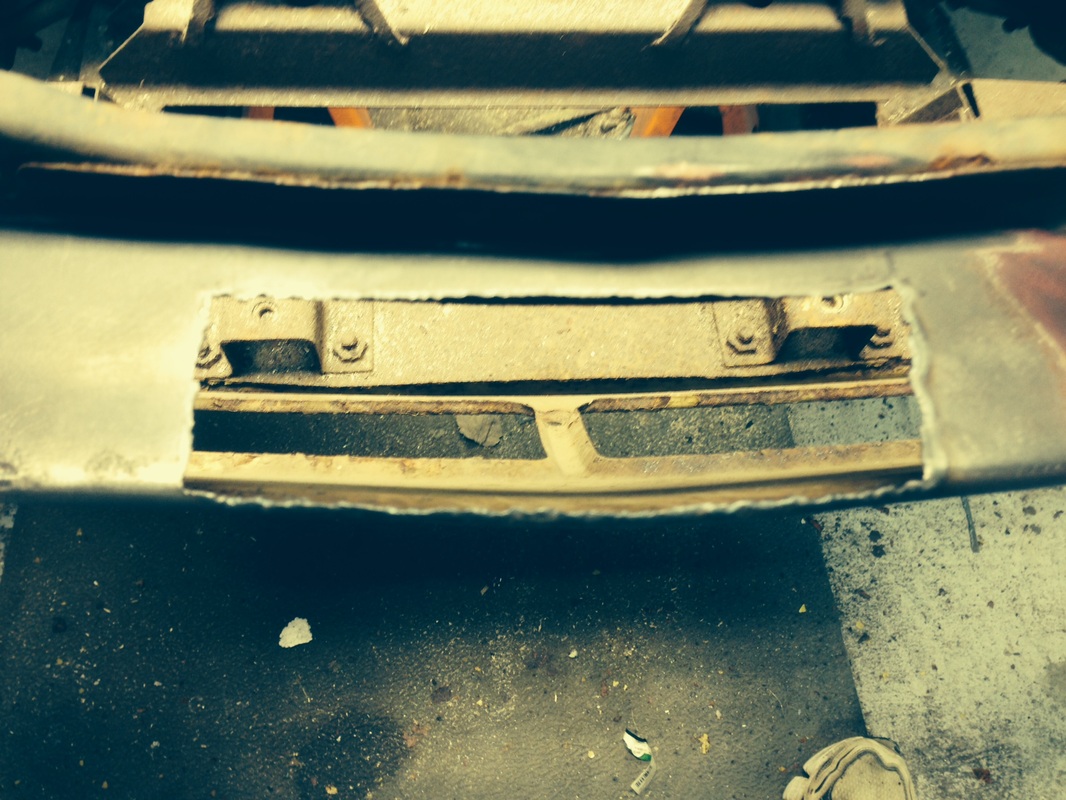
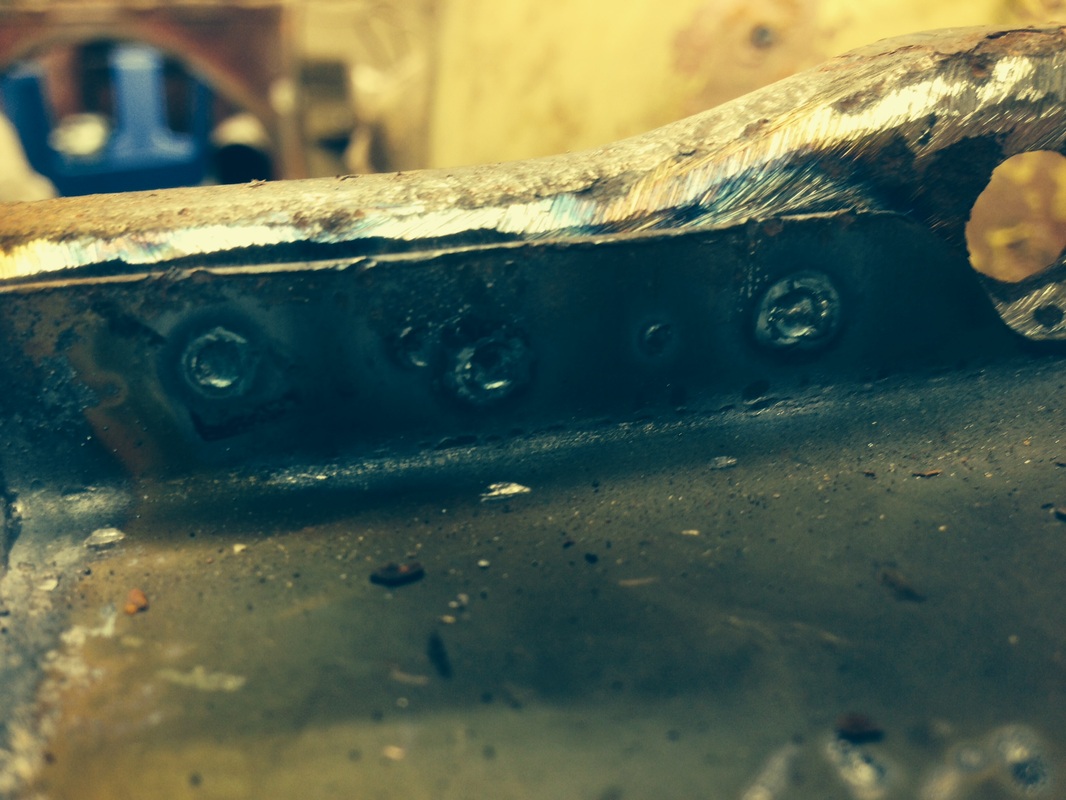
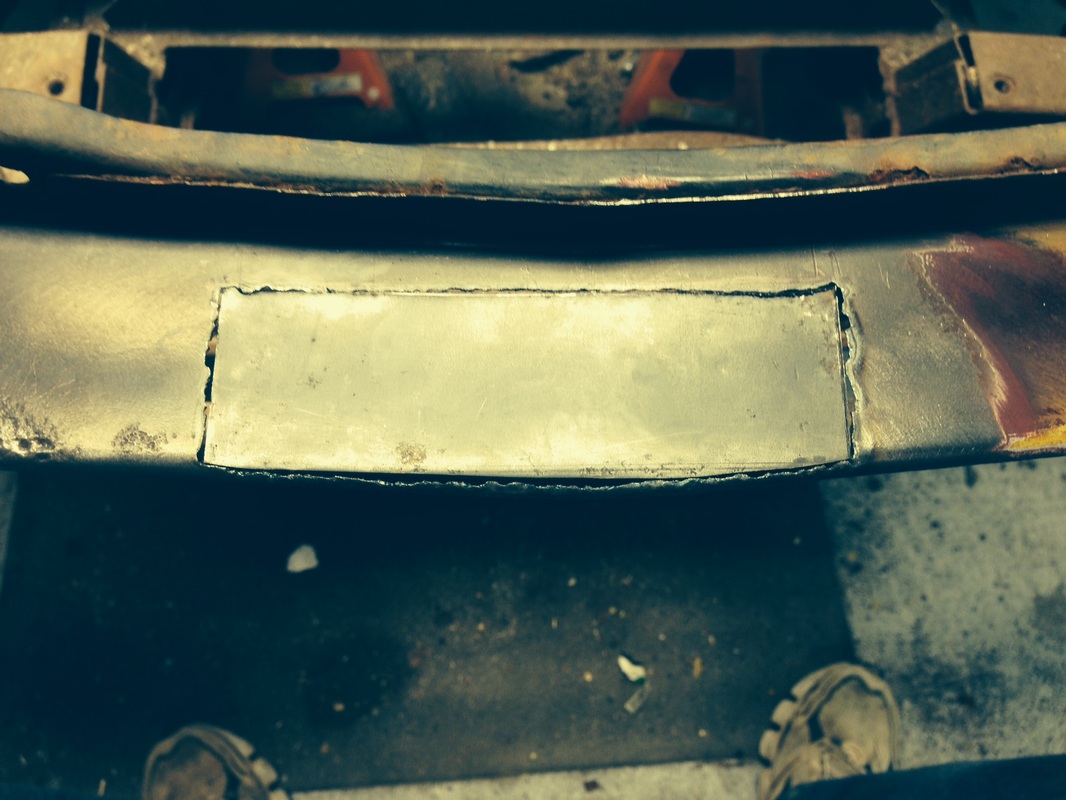
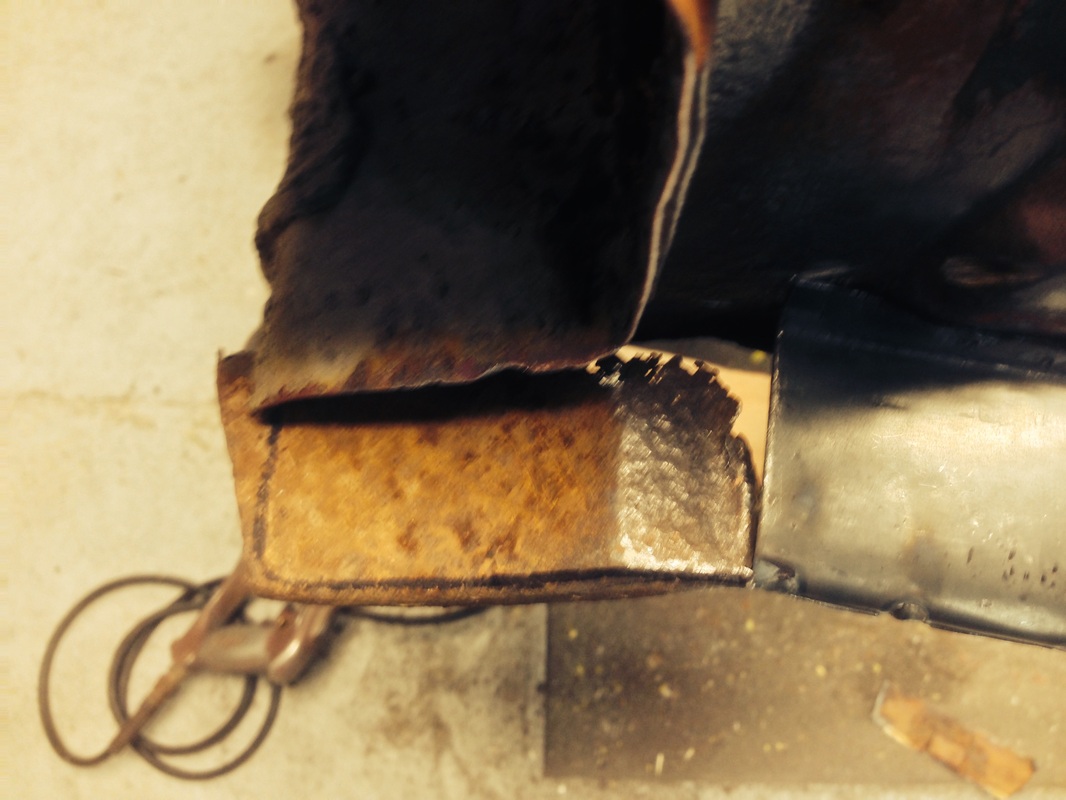
Finally, over the 2014-2015 holiday season, I managed to once again sneak out to the garage. Starting at the front of the car, the valance had some rotted spaces around the three lower grille insert hold-down tabs and under the passenger headlight. The valance is also rusted loose from the bottom of both inner wings for several inches but repairing that will be easier to tackle once the body is off the frame and onto the rotisserie.
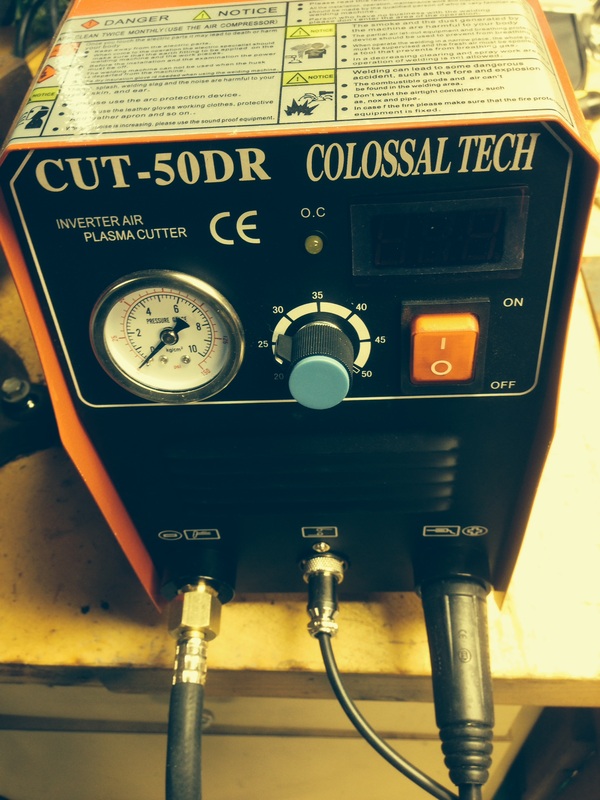
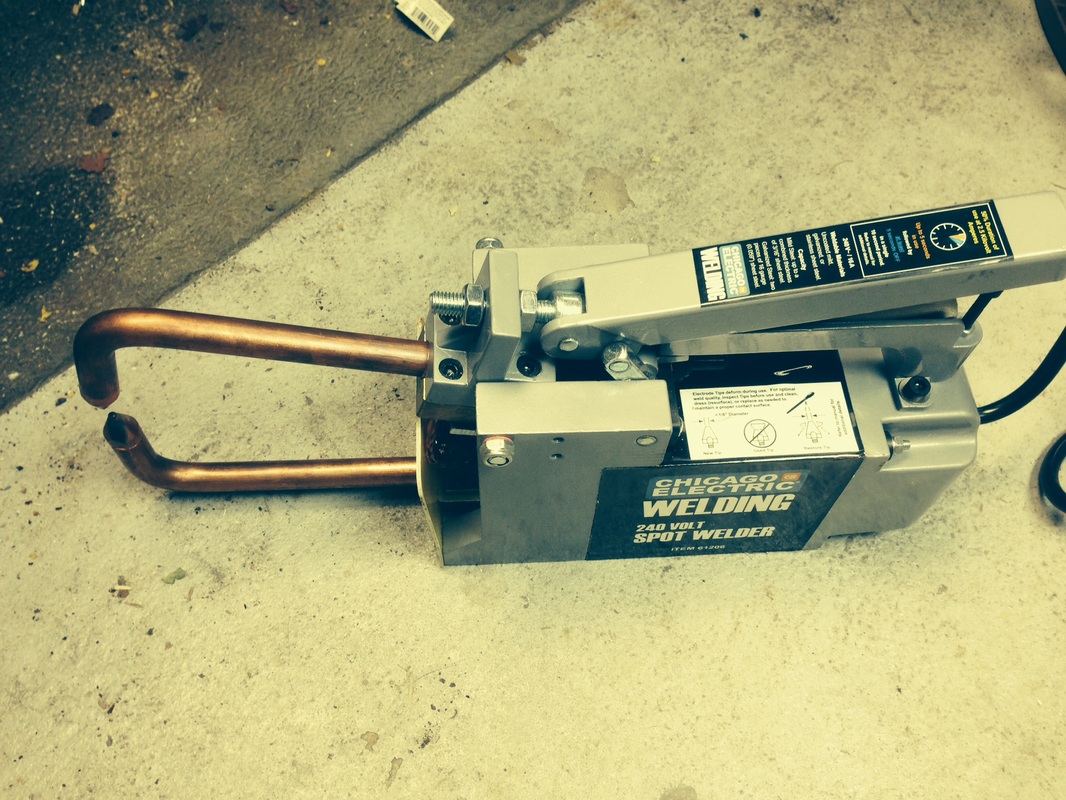
Mrs. Claus (Tina) was nice enough to bring me a plasma cutter and spot welder this holiday season which both work great and aid immensely in sheet metal repairs. With these new toys, I attacked the front valance repairs....
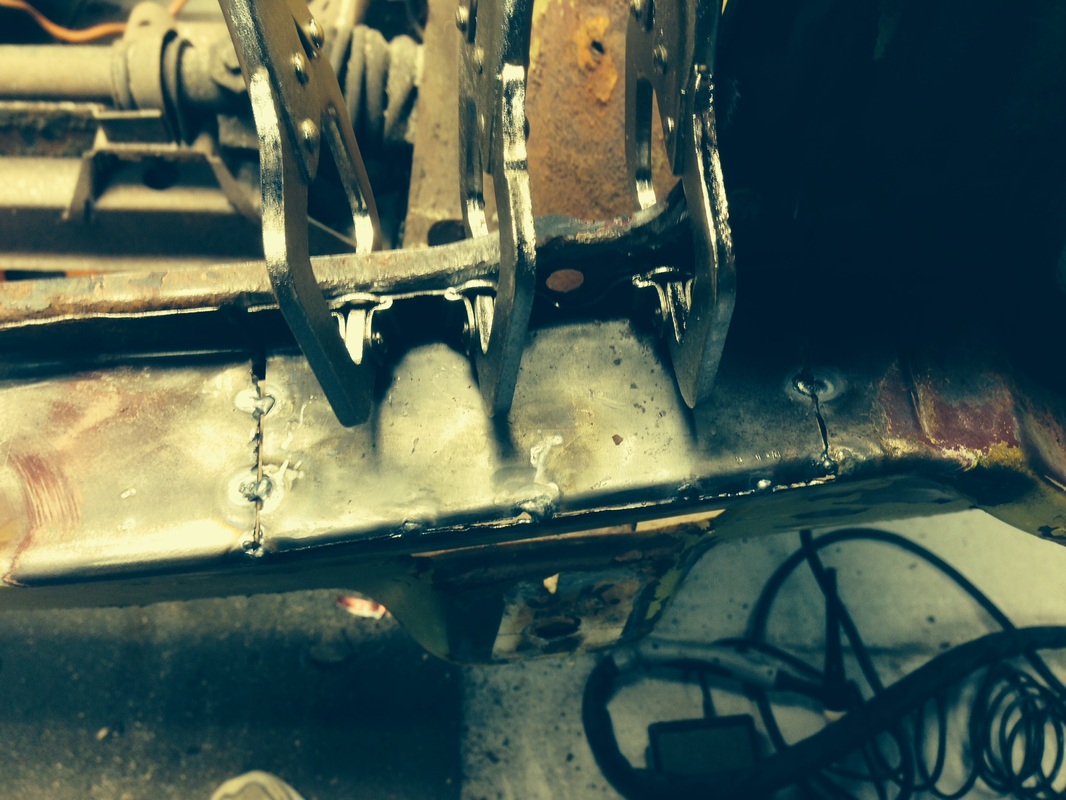
After deciding to what extent I needed to patch, I marked and cut the patch pieces out of flat sheet metal. I used some TIG toys purchased from Harbor Freight that also worked great...how did I ever make it before finding these things. They basically hold and align the two surfaces so that they are flush. A couple can be seen in a photo below. All the patches were TIG'd in place and after fabricating three replacement tabs, those were spot welded into position. The patch for the passenger side tab was carried on under the rotten spot below the headlight on that side in two pieces. This is due to the small angled step at the transition to below the headlight as well as the change in angle as seen from above the work area. This work roughed in the patches.
Finally, over the 2014-2015 holiday season, I managed to once again sneak out to the garage. Starting at the front of the car, the valance had some rotted spaces around the three lower grille insert hold-down tabs and under the passenger headlight. The valance is also rusted loose from the bottom of both inner wings for several inches but repairing that will be easier to tackle once the body is off the frame and onto the rotisserie.
Mrs. Claus (Tina) was nice enough to bring me a plasma cutter and spot welder this holiday season which both work great and aid immensely in sheet metal repairs. With these new toys, I attacked the front valance repairs....
After deciding to what extent I needed to patch, I marked and cut the patch pieces out of flat sheet metal. I used some TIG toys purchased from Harbor Freight that also worked great...how did I ever make it before finding these things. They basically hold and align the two surfaces so that they are flush. A couple can be seen in a photo below. All the patches were TIG'd in place and after fabricating three replacement tabs, those were spot welded into position. The patch for the passenger side tab was carried on under the rotten spot below the headlight on that side in two pieces. This is due to the small angled step at the transition to below the headlight as well as the change in angle as seen from above the work area. This work roughed in the patches.

 RSS Feed
